Selecting, Editing & Transforming
Select curves and LED slices, transform them with on-canvas handles, align and distribute, copy geometry between Surfaces, and drive the project sidebar from the keyboard.
Drawing your rig is the first ten minutes. Refining it is the next two hours — nudging strips, squaring up a wing, duplicating an arch and flipping it, copying a run of pixels into a second Surface, fixing the one curve that's 4 px off. This page is about that work.
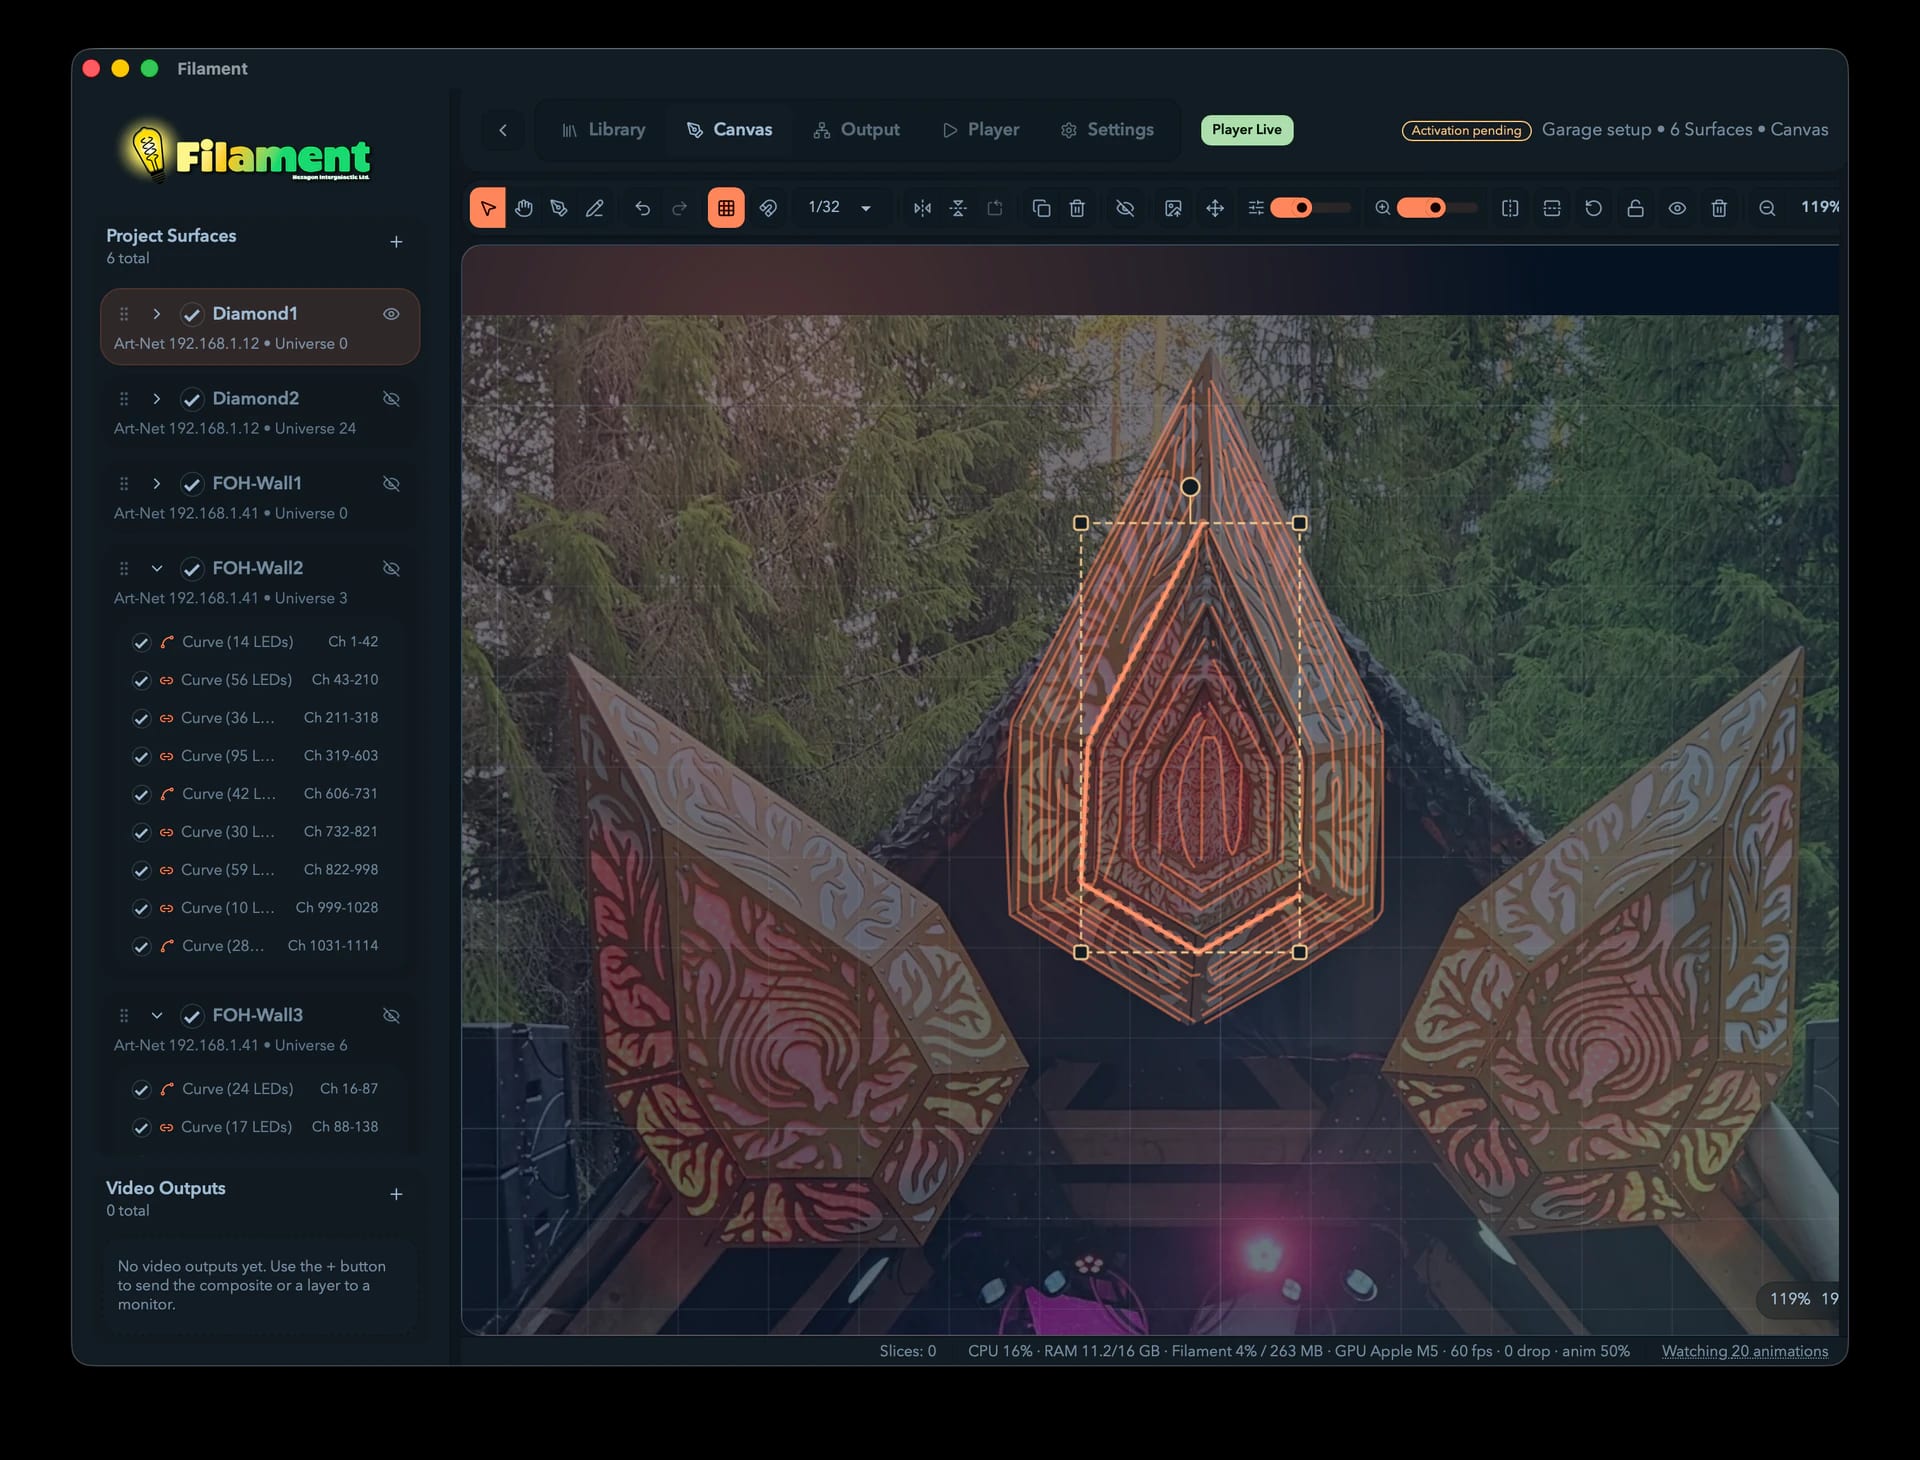
Selection basics (Select tool, V)
V is where you live when you're editing rather than drawing. (The Pan, Draw, and Freehand tools are on Canvas & Drawing.)
| Action | Result |
|---|---|
| Click a curve or slice | Selects it |
| Shift + click | Adds or removes that item |
| Drag on empty canvas | Marquee rectangle |
| Shift + drag | Additive marquee |
Cmd/Ctrl + A | Every standalone slice in the project (see below) |
Escape | Clears the selection and deselects the active Surface |
Curves and slices are mutually exclusive
A selection is either curves or slices, never both. Selecting a curve clears any slice selection and vice versa, so the transform handles always act on one kind of thing. Slices generated by a curve belong to it and can't be marquee-picked on their own — edit them through the curve.
A marquee that touches at least one curve selects the curves it crosses. One touching no curves selects the slices whose centers land inside it. Hidden and disabled Surfaces are skipped.
What Cmd/Ctrl + A actually selects
Standalone slices — imported fixtures, matrix panels — not curve-generated ones. In a project drawn entirely from curves it selects nothing, which surprises people once. Marquee or use the sidebar for a curve-level selection.
Transform handles
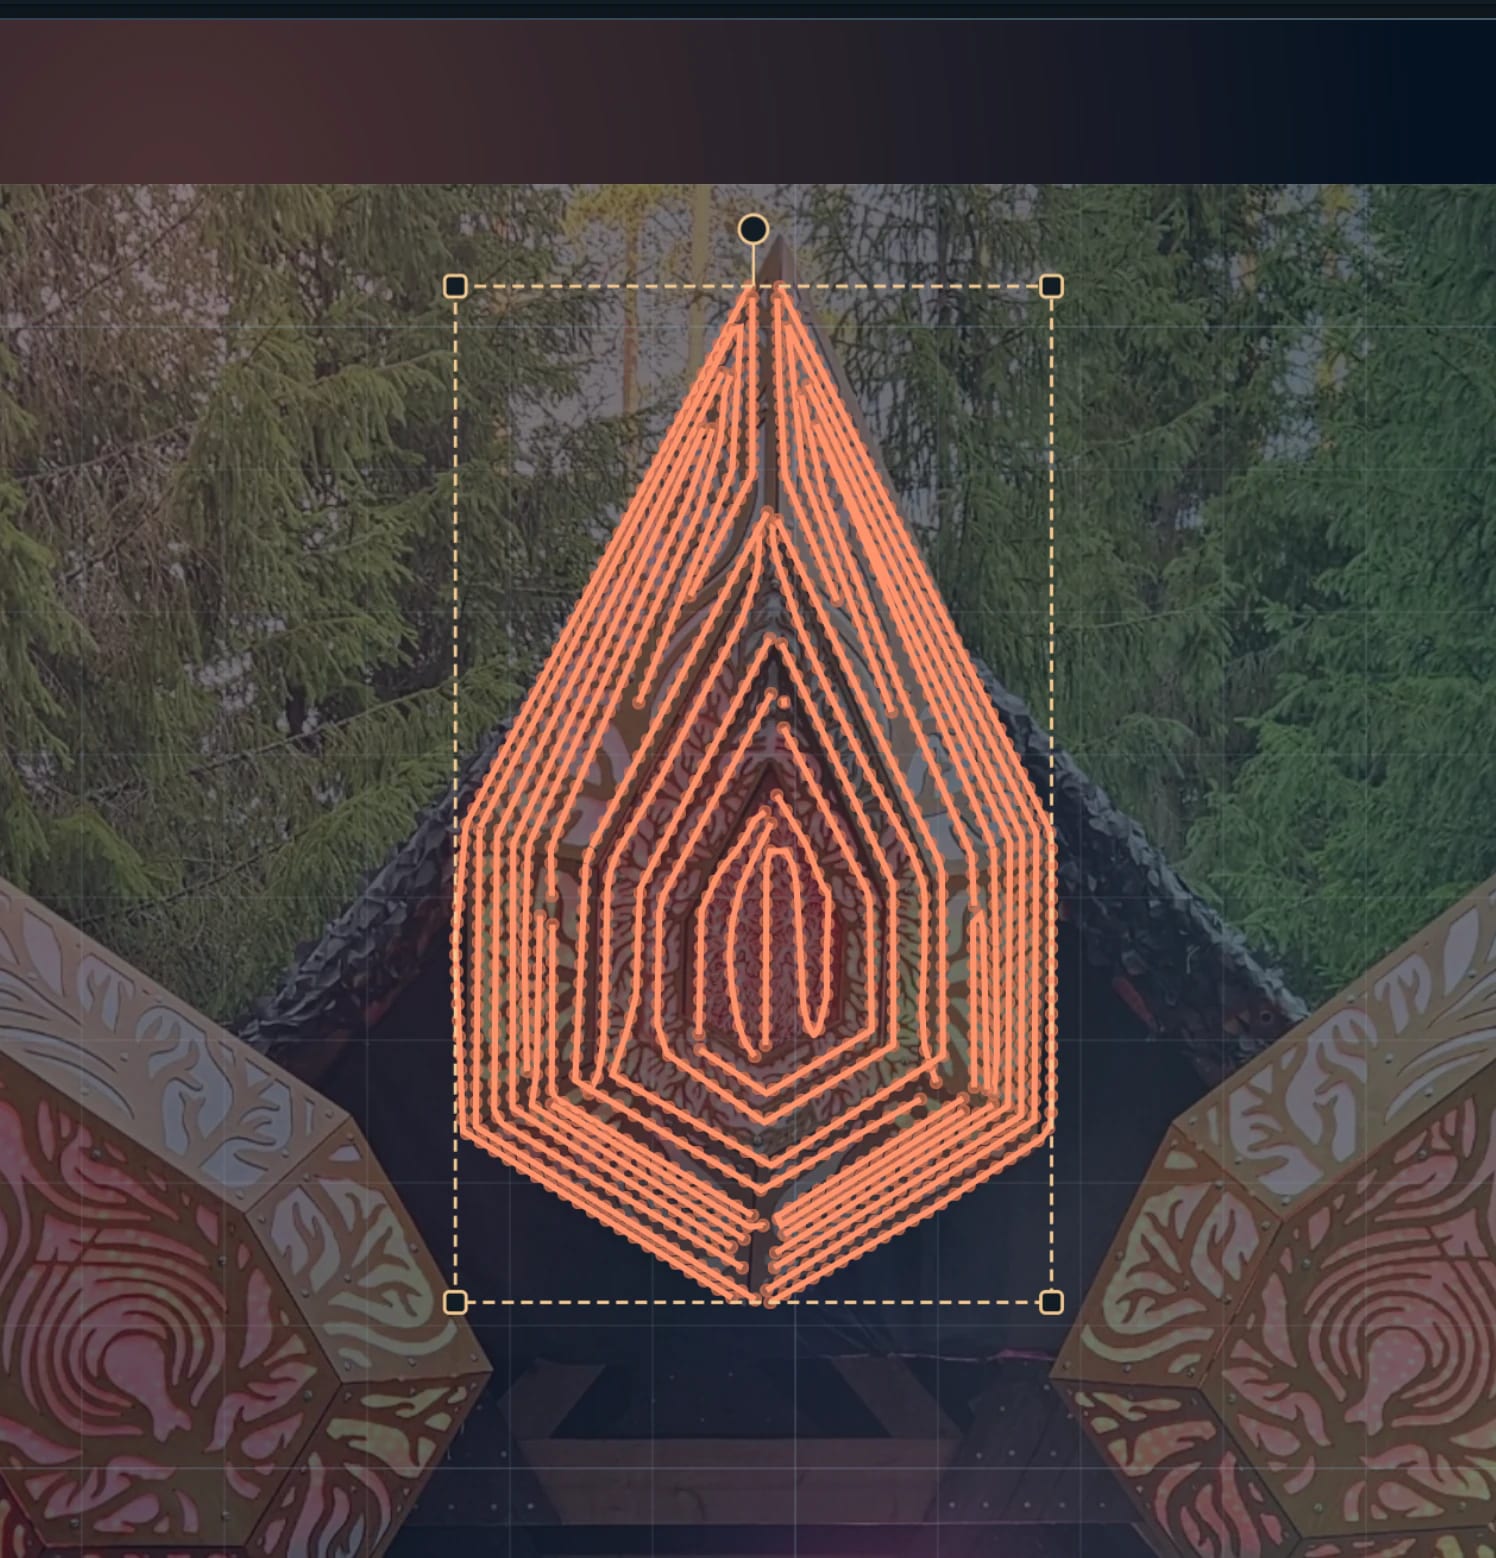
Select something with V active and a dashed frame appears around it.
| Handle | Action |
|---|---|
| Frame body | Drag anywhere inside to move |
| Corner squares | Scale from that corner (the opposite corner stays put) |
| Rotation handle | The circle on a stalk above the top edge, rotating around the center |
You don't have to aim for the body: press on any selected item and drag past about 4 px to start moving it.
Modifiers while dragging a handle:
| Modifier | Effect |
|---|---|
Shift + corner | Aspect-locked scale |
Alt + corner | Scale from the center |
Shift + rotation | Snap to 15° increments |
Cmd/Ctrl | Suspend grid snapping for this drag |
Cmd/Ctrl is snap-bypass, everywhere
Hold Cmd/Ctrl mid-drag and grid snap stops for that drag — on the transform handles, on the LED point editor, and on the warp overlay's transform mode. One modifier, one meaning, no per-tool exceptions to remember. Snap catches you 95% of the time and gets in the way the other 5%; this is the escape hatch.
Nudging
Arrow keys move the selection 0.5 px, or 5 px with Shift. Hold an arrow and the whole burst becomes a single undo step, so twenty taps to walk a strip into place still costs one Cmd+Z to take back.
Alt-drag to duplicate while moving
Hold Alt during a move drag and Filament leaves the originals in place, dragging a fresh copy under your cursor. It's live: keep Alt held through mouse-up to drop the copy, release it before mouse-up and the copy vanishes, leaving the originals moved. Whether you get a copy comes down to whether Alt is down when you let go. Works for slices and curves alike.
Copying geometry
Curves and slices go on the clipboard like anything else.
| Key | Action |
|---|---|
Cmd/Ctrl + C | Copy the selection |
Cmd/Ctrl + X | Cut — copy and delete as one undo step |
Cmd/Ctrl + V | Paste, offset from the original, with fresh IDs |
A pasted curve regenerates its own slices and gets non-overlapping start channels, so pasting never quietly creates a channel conflict. Paste into a different Surface and the geometry re-authors itself there — that's the fast way to build a second identical controller's worth of rig. If the target Surface has no channel room left, you get an error toast and nothing happens; Filament would rather refuse than hand you a broken patch to discover at load-in.
Paste here on the empty-canvas right-click menu drops the clipboard at your cursor instead of at the default offset.
Align and distribute
Select two or more items, right-click, and you get the usual six alignments plus two distributions:
- Align — Left, Center, Right, Top, Middle, Bottom
- Distribute — Horizontally, Vertically
Each action is one undo step. A curve moves its control points and its owned slices in lockstep, so aligning a curve doesn't shear its LEDs off the path.
This is the tool for a wall of matrix panels or a row of vertical battens — draw them roughly, select the lot, align tops, distribute horizontally, done.
Edit operations
The one-click buttons sit along the top toolbar in three groups — history, transform, and duplicate/delete. Each greys out when there's nothing valid to act on.
Undo and redo
| Shortcut | Action |
|---|---|
Cmd/Ctrl + Z | Undo |
Cmd/Ctrl + Shift + Z | Redo |
Cmd/Ctrl + Y | Redo (Windows habit) |
History is per project, 50 steps deep. One gesture is one step — that's the contract everywhere in Filament, so you can experiment without keeping a mental log.
Flip and reset rotation
| Button | Behavior |
|---|---|
| Flip horizontal | Mirrors the selection left-to-right around its center |
| Flip vertical | Mirrors it top-to-bottom |
| Reset rotation | Re-squares each selected slice to axis-aligned |
Flip works on slices or curves. Reset rotation is slices only — it's disabled when only curves are selected. Both earn their keep on mirrored installations: build one side, duplicate, flip.
Duplicate and delete
- Duplicate (
Cmd/Ctrl + D) — copies the selection offset by +24, +24 so it's visible and grabbable, and selects the copy. - Delete (
Delete/Backspace) — deleting a curve takes its generated slices with it; deleting slices takes just those. Both undoable.

Right-click on the canvas
Right-click is the fastest route to most of the above, and it's context-aware.
On a curve: Duplicate, Copy, Cut, Paste, Delete, Flip horizontal / vertical, Add anchors, Simplify anchors, Zoom to selection.
On a slice: the same list, with Reset rotation in place of the anchor tools.
On a multi-selection: the above plus the Align and Distribute sections.
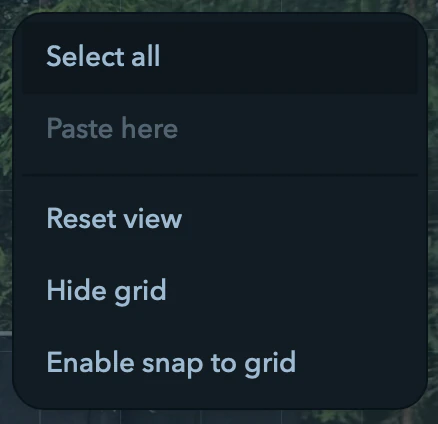
On empty background (Select tool, no video output selected): Select all, Paste here, Reset view, Show / Hide grid, Enable / Disable snap to grid.

Editing existing curves
A curve isn't locked once it exists. Reshape it, change its LED count, switch its fixture, move its start channel — any time.
Double-click the curve on the canvas (or in the sidebar) to reopen its LED configuration dialog for count, fixture, and start channel. That dialog is documented on Canvas & Drawing.
Anchor editing (Draw or Freehand tool + selected curve)
The anchor controls light up only with a curve-authoring tool active — Draw (P) or Freehand (B) — and a curve selected. They do nothing under V.
| Tool | What it does |
|---|---|
| Add anchor points | Subdivides every segment, roughly doubling the anchor count, shape preserved |
| Simplify anchor points | Resamples by arc length to about 70% of the current anchors, evenly spaced |
Add single anchor (+) | Arm a mode where clicking the curve inserts one anchor |
Remove single anchor (−) | Arm a mode where clicking an anchor removes it |
The single-point modes are toggles — click the button or press the key to arm, press again to leave.
Simplify keeps roughly seven anchors in ten and redistributes them evenly. It doesn't preserve original positions or hunt for "redundant" points, so treat it as a thinning pass on a dense freehand stroke rather than a lossless cleanup.
Handles, smooth anchors, and cusps
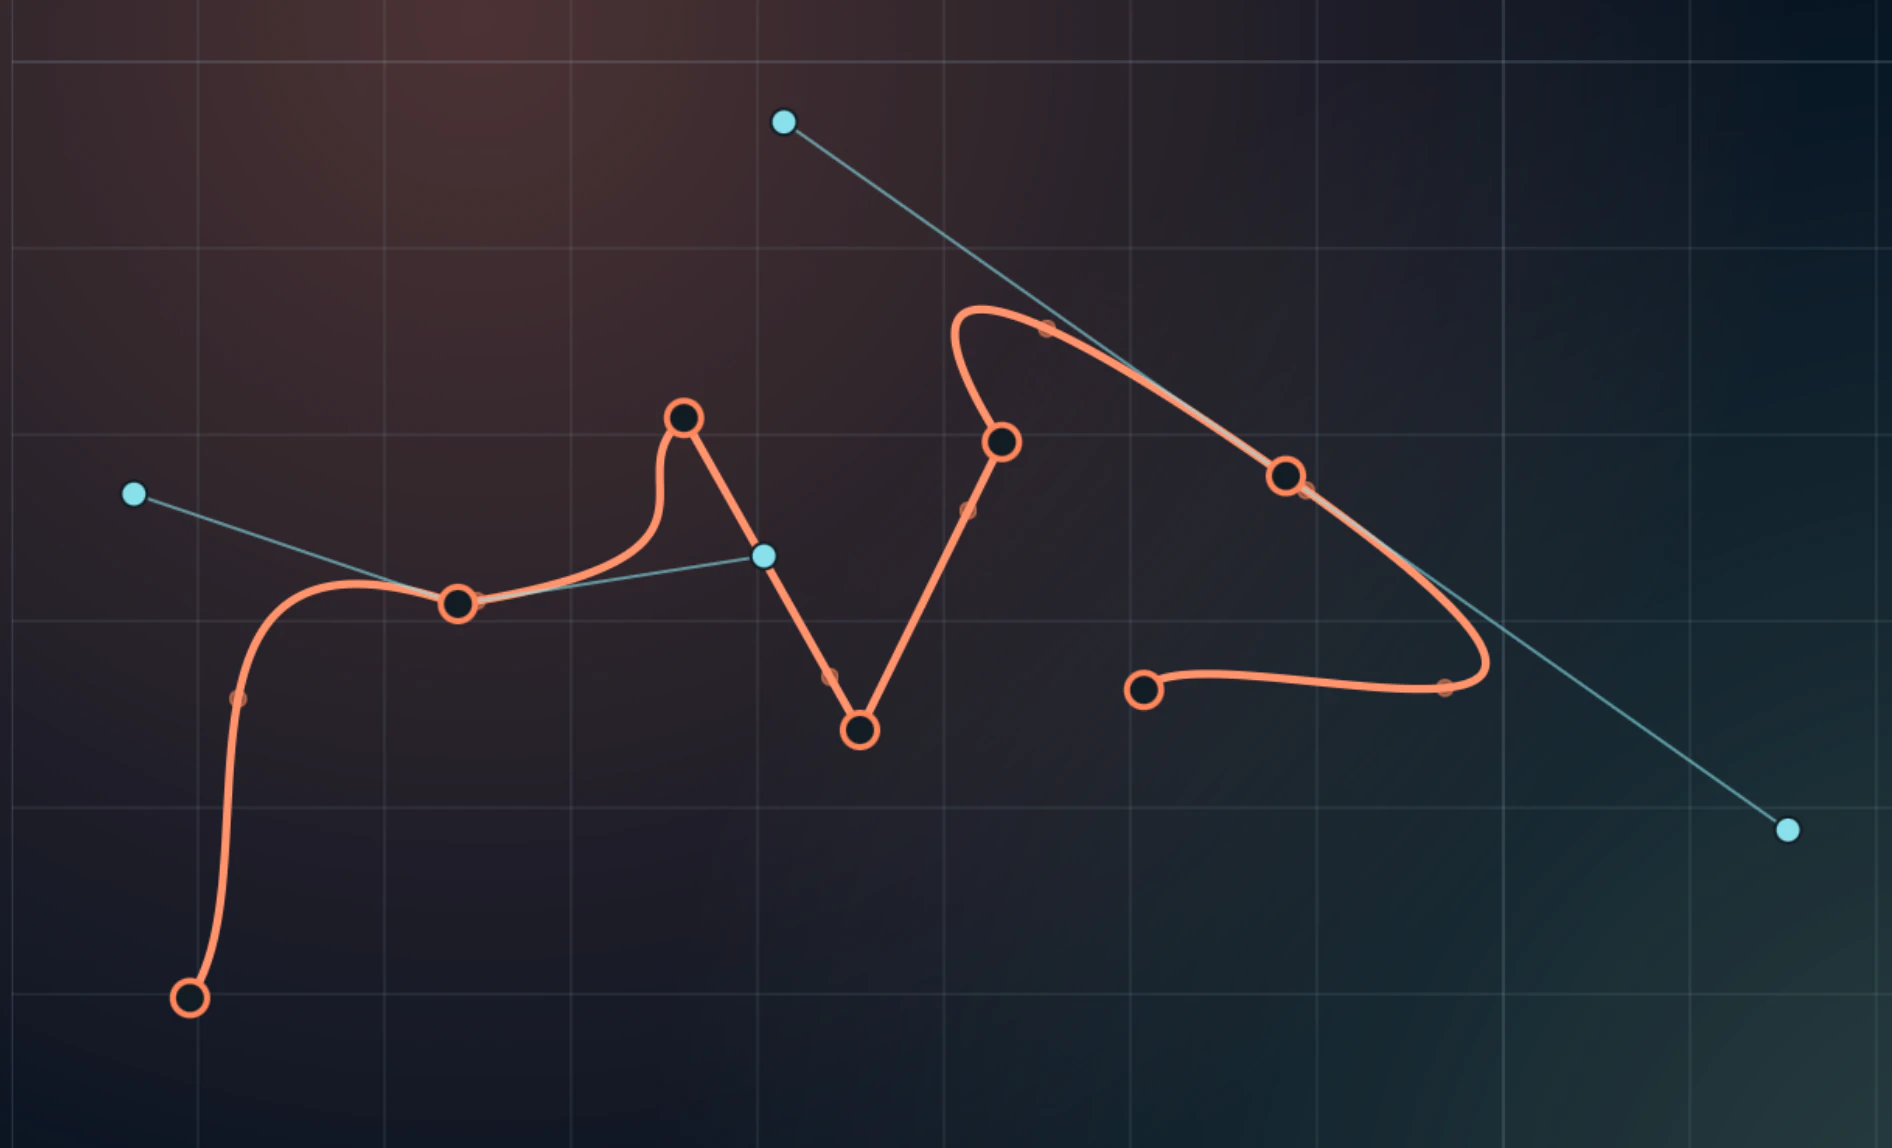
Drag an anchor to move it and its handles follow. Drag a handle endpoint to reshape the curve there.
- On a smooth anchor, a plain handle drag keeps the symmetry — the opposite handle mirrors it. Hold
Altto break that and move only the handle you grabbed. - On a cusp anchor, handles are already independent;
Altchanges nothing. Alt-click an anchor without moving to flip it between smooth and cusp. Going to cusp strips its handles; going to smooth synthesizes them from the neighbouring tangent.
Smooth-by-default is the right bias for LED strips: physical strips bend in arcs, and you want a hard corner only where you actually folded the tape.
For quick channel patching, double-click a curve's channel badge in the sidebar to edit its start channel inline, or use its right-click menu.
The sidebar: your project tree
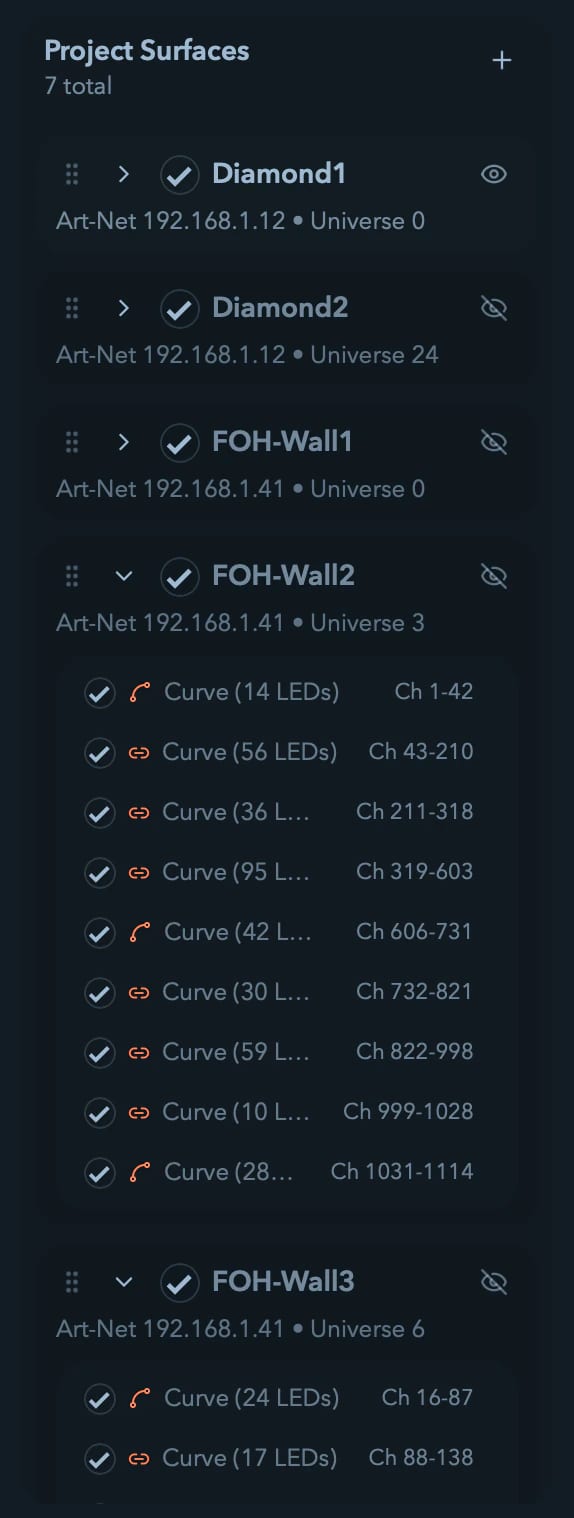
The left sidebar — Project Surfaces — is a control panel, not a viewer. Click an item to select it on the canvas; Shift + click a curve to add it to a curve selection. The + in the header adds an empty Surface.
Driving it from the keyboard
Click a row once and the list owns the keyboard:
| Key | Action |
|---|---|
↑ / ↓ | Move focus and selection together |
← / → | Collapse / expand the focused Surface |
Home / End | First / last Surface |
Enter | Reselect the focused Surface |
F2 | Rename inline |
| Type a name prefix | Jump to that Surface |
Shift + F10 or the Menu key | Open that row's context menu, positioned at the row |
While a row has focus the arrows stay in the list — they won't also nudge geometry on the canvas behind it.
Multi-selecting Surfaces
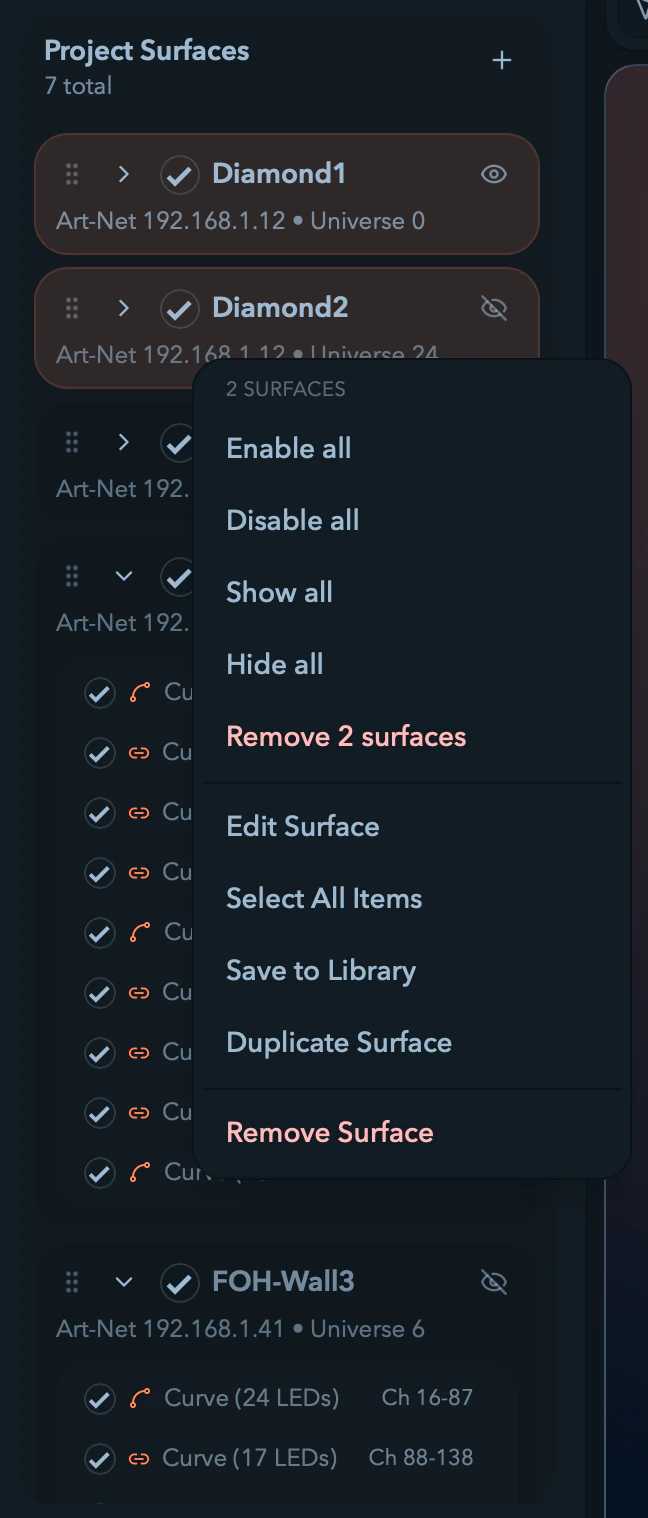
Cmd/Ctrl-click toggles Surfaces into a multi-selection; Shift-click range-selects over list order; a plain click still single-selects. Every selected row highlights.
With more than one selected, the context menu gains a bulk section: Enable all, Disable all, Show all, Hide all, and Remove N surfaces (which confirms, count and all). Each is exactly one undo step — useful when a rig arrives as fifteen imported Surfaces and you want twelve of them dark for a soundcheck.
Surface rows
Each Surface is a top-level row with an expand arrow, an enable checkbox (disable to mute its output while keeping it in the tree), the name (double-click to rename; Enter confirms, Escape cancels), and an eye icon to hide its slices on the canvas without touching its enabled state. Expanded, the row shows its output summary and then its parts.
Curve and fixture-group rows
Each curve row shows a spline icon (or a link icon when it's chained), its label, and a channel badge like Ch 1-180 — double-click the badge to edit the start channel inline.
Each fixture-group row (slices not generated by a curve — imported or matrix fixtures) shows its label, channel badge, and an expand arrow when the group holds more than one fixture. A scissors icon marks where a group split begins.
These rows are quick affordances. The full channel-shift, group-split, and chained-curve merge workflow lives in Output & DMX Routing.
Right-click menus
A Surface:
| Item | Action |
|---|---|
| Edit Surface | Selects it and opens the Output tab for protocol, destination, and universe |
| Select All Items | Every curve and slice in this Surface |
| Save to Library | Saves the Surface as a library entry |
| Duplicate Surface | Clones the whole thing |
| Remove Surface | Deletes it, with confirmation |
A curve:
| Item | Action |
|---|---|
| Curve Settings | Opens the LED configuration dialog |
| Edit Start Channel | Inline channel override |
| Save Curve to Library | Saves it (Save Selected Curves… for several) |
| Duplicate Curve | Clones it (Duplicate Selected Curves for several) |
| Delete Curve | Removes it and its slices (Delete Selected Curves for several) |
The empty area below the list: Create Surface.
Tips for efficient layout work
- Build one side, duplicate, flip for anything symmetric — arches, wings, mirror rigs.
- Align and distribute a wall of panels instead of eyeballing them.
- Copy a curve into a second Surface rather than redrawing it; channels re-assign themselves.
- Name Surfaces like patch entries — "Stage Left — WLED 192.168.1.10" — so the tree reads like a wiring diagram.
- Uncheck a Surface to mute it while you troubleshoot the rest of the rig.
- Experiment freely. Fifty undo steps per project, one per gesture.