Video Outputs
Send the composite, a group, or a single layer to monitors, projectors, other apps, or a file — with per-slice warp, masking, and multi-projector edge blending.
Filament doesn't only drive LEDs. A video output takes your rendered show out to a monitor or projector — or to another app, or a file — warped, masked, and cropped to fit whatever you're throwing it at. Several can run at once, each its own window with its own mapping.
This is the projection sibling of Output & DMX Routing: the same composite your LEDs sample can also light up a wall, a screen, or a sculpture.
Where it lives
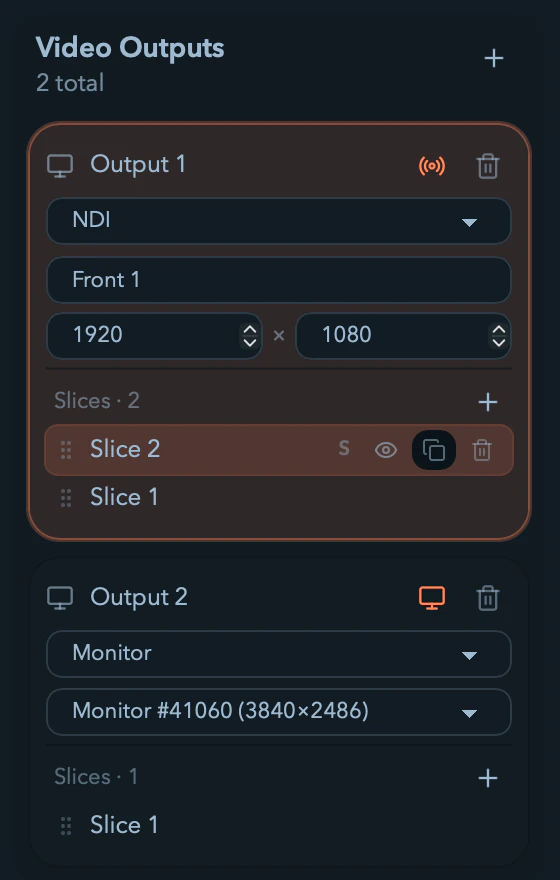
The Video Outputs section sits in the main left sidebar, alongside your project Surfaces. It's on the Library, Canvas, and Output tabs, and tucks away on Player and Settings.
The header shows the title, a running count, and a + to add an output. With none yet, a hint reads "No video outputs yet. Use the + button to send the composite or a layer to a monitor."
An output is a stack of slices
This is the one structural idea worth getting straight, because everything else follows from it.
A video output is an output frame plus an ordered stack of slices. The output owns the destination, the resolution, the edge blend, and the test grid. Each slice owns a piece of content and how that piece lands in the frame:
| The output decides | Each slice decides |
|---|---|
| Where frames go (monitor, Syphon, Spout, NDI, file) | Which source it draws — composite, a group, or a single layer |
| Frame resolution | Its crop of that source |
| How alpha resolves | Its warp into the frame |
| Multi-projector edge blend | Its mask |
| The alignment test grid | Its opacity, enable, and solo |
Slices composite bottom-up, index 0 first, exactly like a layer stack. A new output starts with one slice called Slice 1 covering the whole frame, and if that's all you ever need, you can happily ignore the rest of this idea.
But it's what makes the awkward jobs possible. One projector covering two walls that need different content? Two slices, two sources, two warps, one output window. A 4×3-metre LED wall fed by one output but physically built from three panels at slightly different angles? Three slices. Feeding a projector whose left third is blocked by a pillar? Mask it out.
Working the slice stack
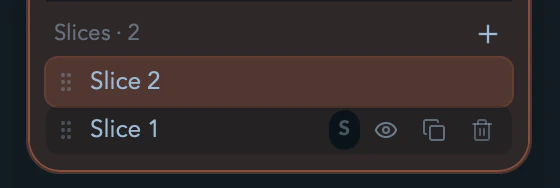
Each output card lists its slices topmost-first, like a layer stack:
- Drag a row to reorder — row order is composite order.
- Enable / solo toggles per slice. Solo is scoped to that output: with any enabled slice soloed, only soloed slices render.
- Hover buttons for add, duplicate, and delete.
- Right-click a row for Rename… (
F2), Solo, Enable / Disable, Duplicate, Delete. - Click a row to select that slice for editing on the Canvas.
Adding an output
Click + in the section header. A new output appears as a compact card and is selected for canvas editing right away. The card stacks:
- Name — single-click selects the output for canvas editing; double-click to rename.
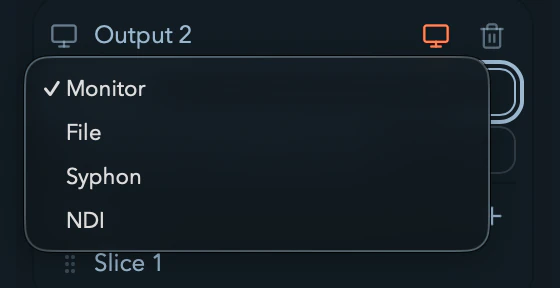
- Transport dropdown —
Monitor,Syphon,Spout,NDI, orFile. Transports your build can't drive are hidden rather than shown broken. - A toggle button — for
Monitor, an icon that opens the output window (turning red to close it); for the others, a start/stop for the publish or recording. - A trash icon. Deleting an open output closes its window first.
- The slice list, below.
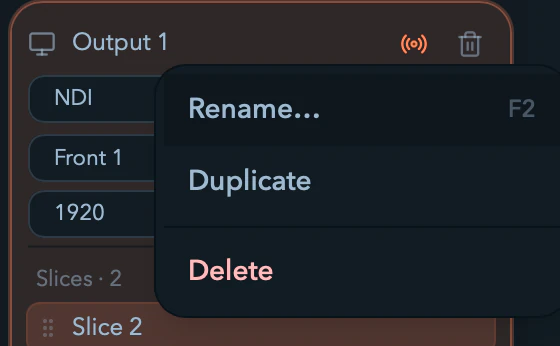
Right-click an output card for Rename… (F2), Duplicate, Open / Close window, and Delete.
A duplicated output arrives disabled, with fresh IDs and cloned slices, named "… copy". That's deliberate: duplicating a Display output mid-show should not fire a second projector window at the audience.
Choosing what a slice shows
Select a slice and the canvas toolbar gives you a Slice source picker and a Slice opacity fader. The source options:
- Composite — the full post-master composite, the exact texture your LEDs sample. What you see on the Player is what goes out.
- Group — one group's contribution.
- Layer — a single layer's post-effects texture.
Routing one layer to a projector while the composite drives the LEDs — or different layers to different screens — is the whole point. Build and mix on the Player, then decide here what carries which look.

If a slice's routed layer or group is disabled, empty, or removed, that slice renders black. It never falls through to the composite, so a routed projector can't accidentally leak the whole show at a moment you weren't watching.
Sending to a monitor
Monitor is the primary projection-mapping path: a borderless fullscreen window on the display you pick, presenting your warped output GPU-direct at full resolution. There's no readback on this path, so an output window never paces the show.
Pick a display
With Monitor selected, a picker lists every connected display by name and resolution, e.g. Display 2 (3840×2160), and picking one sets the output's frame resolution to match. Change the display while the window is open and the window moves.
Open and close
Click the Monitor icon to open the window. Content appears immediately, letterboxed to your project's aspect ratio — never stretched onto a mismatched monitor — so circles stay round on a screen of any shape.
The icon turns red while the window is open; click again to close. Open as many monitor outputs as you have displays.
All output windows close when the main Filament window does. An output never outlives its source.
Mapping on the canvas
Click a slice (or an output name) in the sidebar and its mapping editor opens on the Canvas tab. Selecting a video output is mutually exclusive with selecting a Surface — you're editing one or the other, and the output's context toolbar replaces the LED tools while you are.
Four edit modes
A joined toggle switches what your cursor is doing:
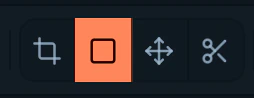
| Mode | Icon | What you edit |
|---|---|---|
| Crop | Crop | The slice's input crop — a 0..1 rectangle over the source, drawn in blue, with corner handles to resize and a body drag to pan. |
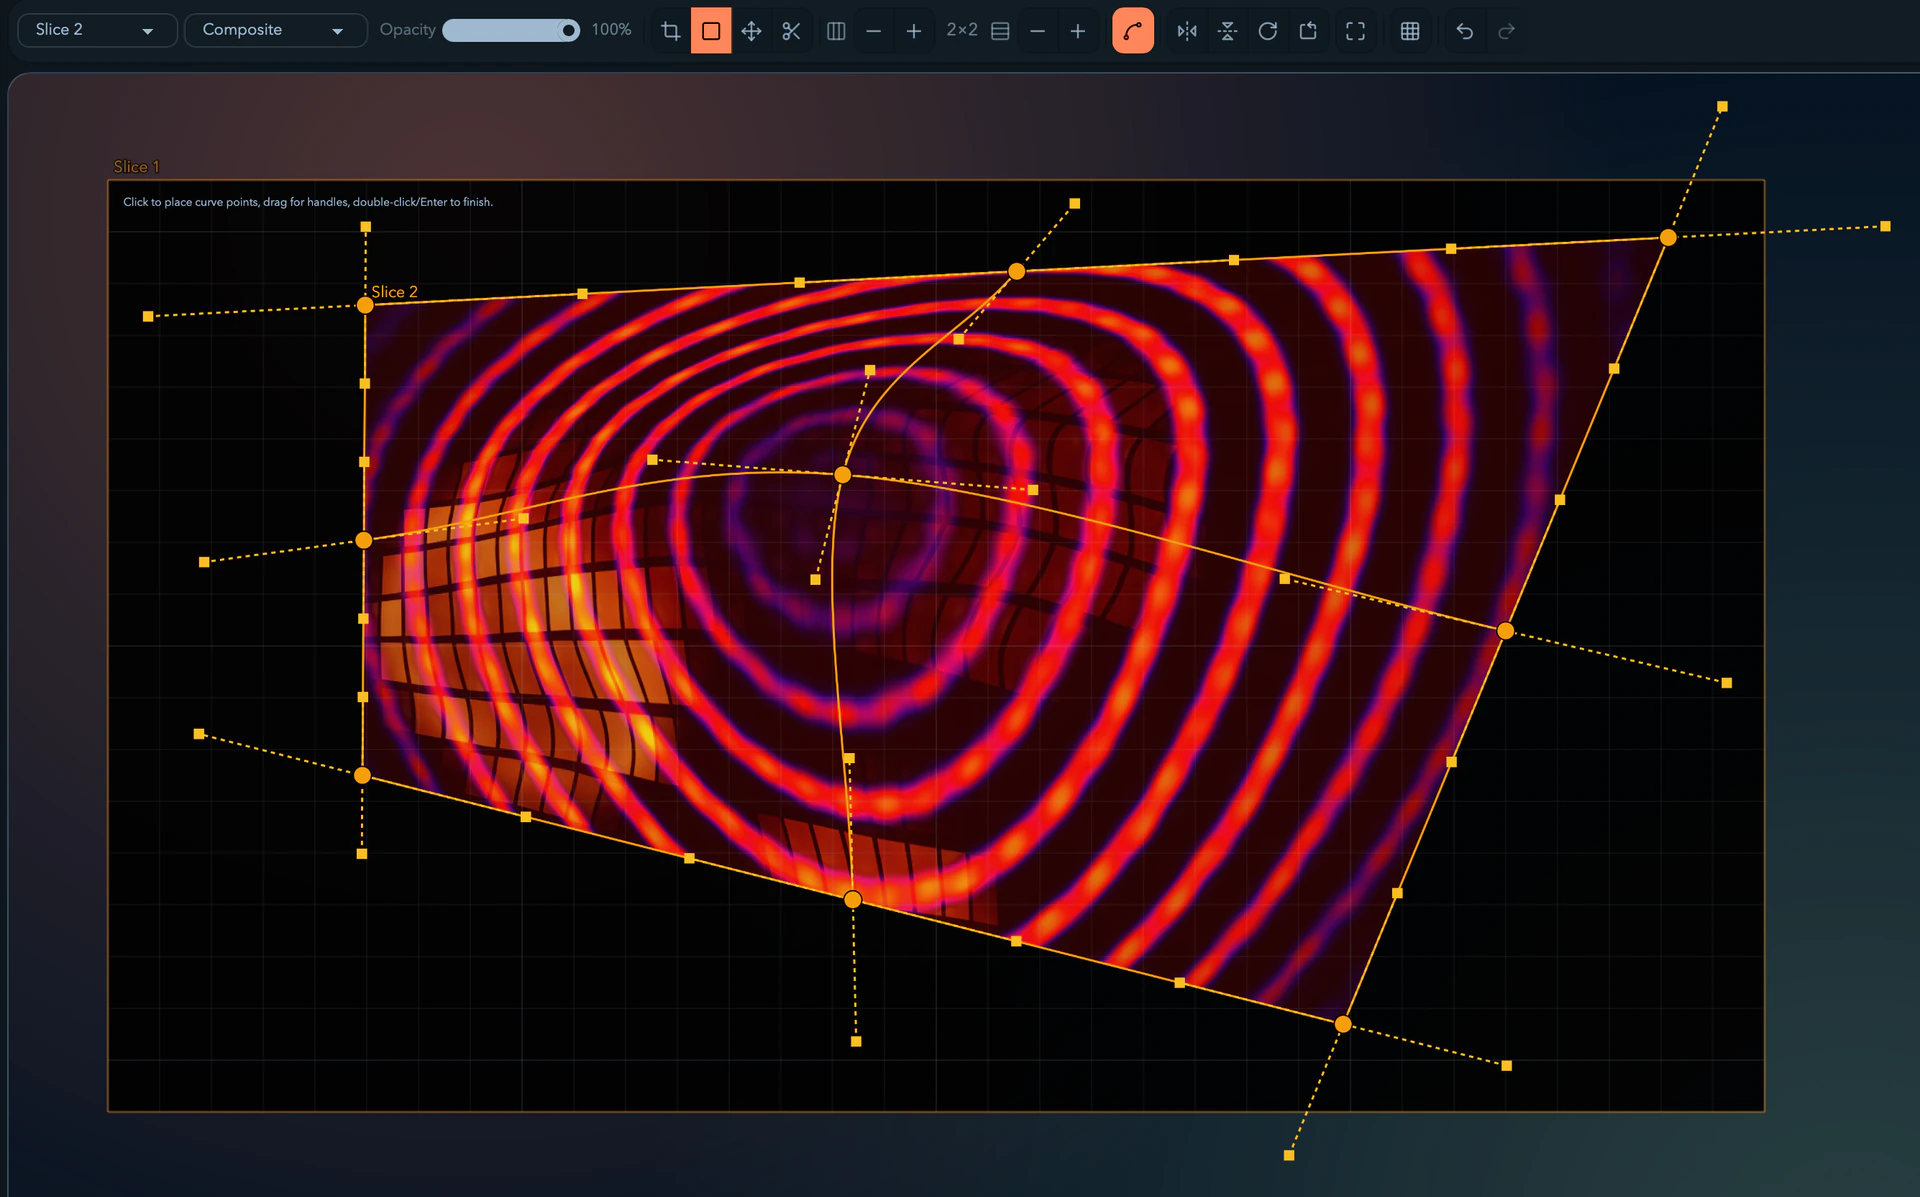
| Warp | Square | The warp cage — an amber grid of control points shaping how the slice lands in the frame. Selecting a slice starts you here. |
| Transform | Move | Move, scale, and rotate the whole warp as a unit, without touching individual points. |
| Mask | Scissors | Draw and combine mask shapes that hide or reveal parts of the slice. |
Crop-then-warp is the order that matters: you pick the part of the source you want, then decide where it goes. Transform mode exists because "nudge the entire mapping 30 px left" shouldn't mean dragging sixteen control points.
The warp cage
| Control | What it does |
|---|---|
| Columns / Rows | Subdivisions per axis, doubling or halving each click (1, 2, 4, 8, up to 16). The readout reads like 3×2. |
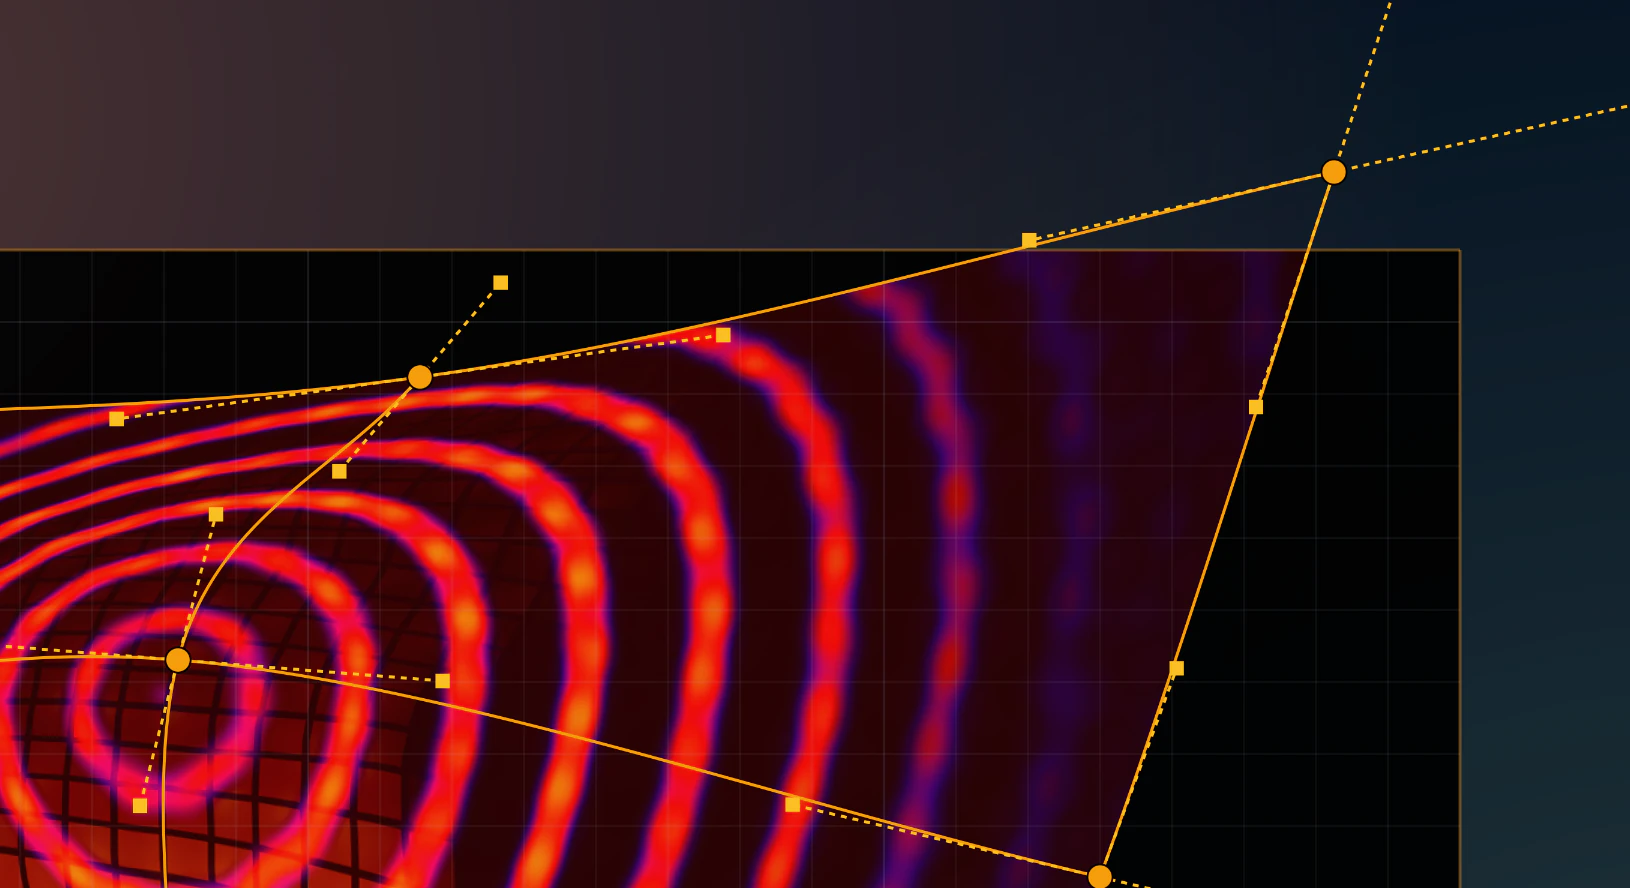
| Bezier toggle | Linear (straight cage edges) or Bezier (curved). In bezier mode each control point gains amber dashed tangent handles. |
| Flip H / Flip V | Mirror the image. |
| Rotate 90° / Rotate 180° | Rotate in 90° steps. |
| Reset | Back to a full-frame identity warp. |
| Alignment test grid | Throw a calibration grid onto the live output for physically lining up. |
Drag a control point to move that part of the image; in bezier mode drag its tangent knobs to bend the edges meeting it. Points can be dragged outside the frame — overscan — which is how you keystone an angled throw by pulling a corner past the edge.

Start with 1×1 and only subdivide when the surface actually needs it. A 16×16 cage on a flat wall is sixteen times the points to fix when the projector gets bumped.
Keyboard nudge
Arrow keys move things precisely, and what they move depends on the mode: in Crop the crop rectangle, in Warp and Transform the whole cage, in Mask the selected shape. Shift for coarse steps. A held burst is one undo step, and undo restores the exact prior geometry.
Every drag and every toolbar action is a single undo step, so you can step back through a mapping session cleanly. Handles and lines scale with canvas zoom, so they stay grabbable whether you're framing the whole surface or one corner of it.
Masking
Mask mode is for the parts of the projection you don't want: the pillar, the fire door, the strip of ceiling above the screen, the overlap seam with the projector next to you.
Pick a draw tool and draw on the canvas:
| Tool | Key | Notes |
|---|---|---|
| Select & edit | V | Move shapes and points. Alt-drag a bezier handle to smooth it. |
| Rectangle | M | Shift for square, Alt from the centre. |
| Ellipse | E | Shift for circle, Alt from the centre. |
| Polygon | L | Click points, Enter to close. |
| Bezier pen | P | Click points, Enter to close. |
| Freehand brush | B | Drag. |
| Edge-blend seam | S | Click points, Enter to commit. |
Two settings decide what a new shape does:
- Reveal (eye) keeps what's inside the shape; Hide (eye-off) cuts it out. Stack them and you can build up an arbitrary silhouette — reveal the wall, hide the window.
- Out / Src picks the space the shape lives in: the output frame (mask where it lands on the wall) or the content source (mask what the source shows, before warping). Out is what you want for architecture; Src for cropping content irregularly.
An Invert toggle flips the combined result, and the Shapes (N) dropdown lists the stack for reordering, toggling, and deleting.

One thing to keep in your head: in the mask editor, Alt-drag is what smooths a bezier handle. On LED curves it's what breaks one. Same key, opposite jobs, so slow down for a second when you're moving between the two.
Multi-projector edge blending
When two projectors overlap, the overlap is twice as bright and the seam is obvious. Edge blend applies a brightness ramp across the frame — four per-edge bands plus freeform seams you draw with the S tool — so the overlap sums to normal instead of glowing.
It's a brightness multiply on the output frame, not a coverage mask, which is what makes two ramps add up correctly where they meet. Turn on the alignment test grid on both projectors, overlap them until the grids line up, then pull the blend bands in until the seam disappears.
Live editing against the real surface
Warp, crop, mask, and source edits push to the live output window with minimal latency, so you keystone against the actual projection surface in real time. Throw the test grid up, drag corners until the lines match the physical edges, turn it off. That's the job.
Other destinations
Beyond a monitor, an output can target a sharing, network, or recording destination. Pick it from the transport dropdown; the toggle on the card arms and stops the publish or recording.
| Destination | What it's for | Platforms |
|---|---|---|
| Syphon | Share as a GPU frame stream to other apps on the same Mac | macOS only |
| Spout | Share as a GPU frame stream to other apps on the same PC | Windows only |
| NDI | Send over the local network to other machines and apps | macOS and Windows |
| File | Record to a video file (H.264, ProRes, or FFV1) | Cross-platform |
Syphon, Spout, and NDI are the send side of the same protocols External Sources reads on the receive side. So Filament can hand its warped output straight to Resolume, a media server, or another machine — the mirror of pulling their feeds into your grid.
Display and File outputs flatten the alpha-carrying composite over an opaque background. Syphon, Spout, and NDI can pass premultiplied RGBA straight through, so a keyed layer stays keyed on the way to the next app.
Persistence
Video outputs save with the project and survive save, reload, and Duplicate Project. Everything comes back: name, transport, monitor and resolution, alpha and background, edge blend, and every slice with its source, crop, warp (subdivisions, control points, tangents, flips, rotation, linear/bezier mode), mask shapes, and opacity.
Map a venue once. Reopen the project next year and it's exactly as you left it.
Built for the show
Video outputs follow the same live-performance contract as the rest of Filament:
- GPU-direct present uses non-blocking modes, so an output never paces the DMX tick.
- Output windows survive monitor resize — a display that changes resolution or scale gets its swapchain reconfigured, not a stretched image.
- Automatic recovery after GPU device-loss: windows stay up, surfaces are rebuilt, present resumes without a manual reopen.
- Configs persist, so warps and routing come back after any restart.