The Timeline
The Timeline is the Player's Arrangement view — a DAW-style workspace where you lay clips, video, and audio on tracks over time and play a composed show back frame-exact, every run.
The Player grid is built for playing live: you fire cells by hand or let autopilot cycle them. That's the right tool for an improvised set and the wrong tool for a show that has to run the same way every night. A gallery installation, a theater cue sheet, or a piece cut to music needs clips at exact times, automation that's part of the composition, and playback that never drifts — for hours, unattended.
The Timeline is that tool. It's a second view of the same project: an Arrangement view where clips (animations, video, stills, external sources, and audio) sit on a horizontal timeline, trimmed, faded, crossfaded, and automated, then played back deterministically. Compose the show once; it runs itself.
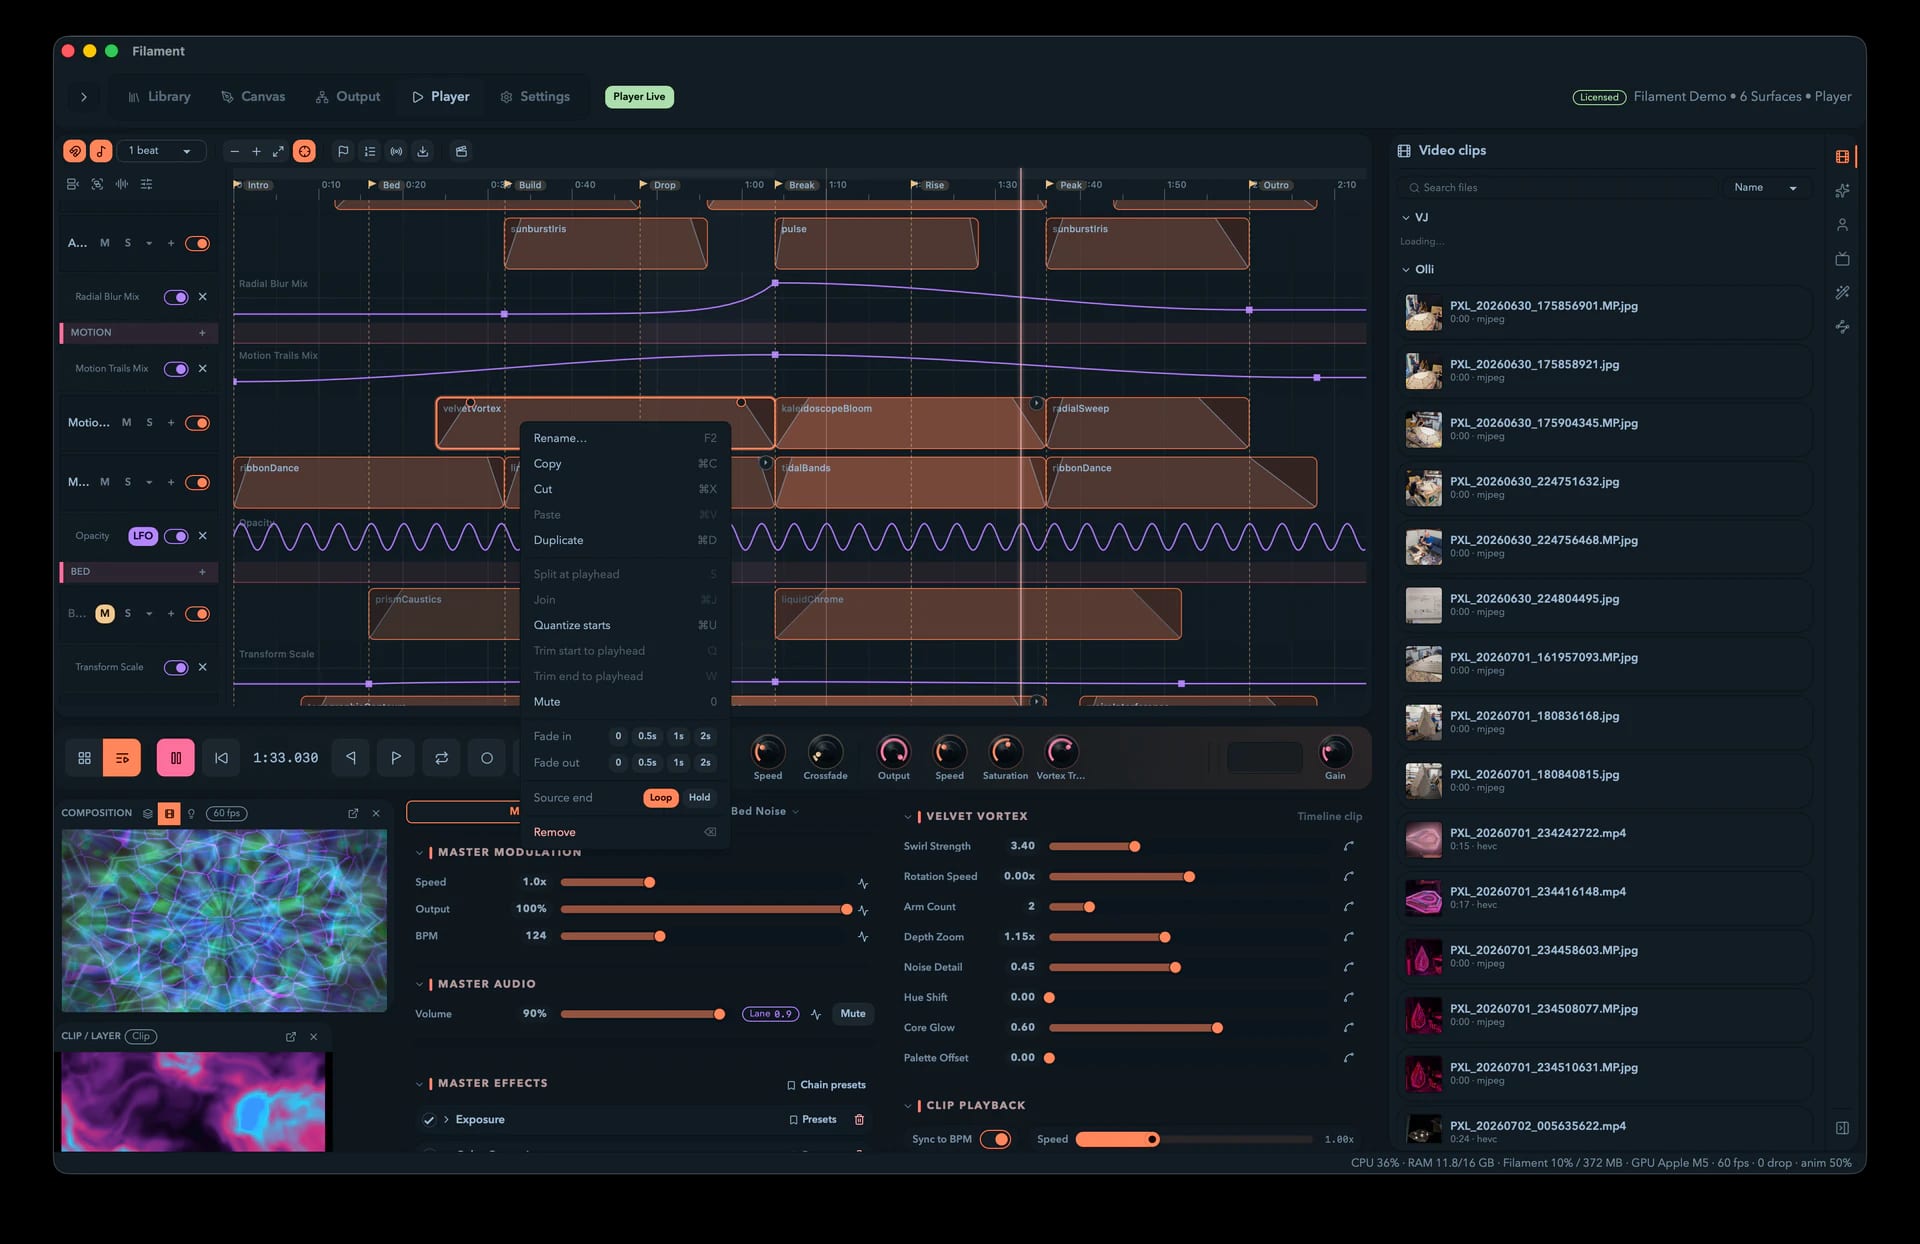
Two views, one project
Filament's Player has two views, and one drives playback at a time:
| View | What it's for |
|---|---|
| Session | The clip grid — layers × columns you cue live. Improvised sets, busking, anything you drive by hand. |
| Arrangement | The Timeline — clips placed on tracks over time. Composed shows that play back on their own. |
They are the same project. Layers, groups, effects, outputs, the mixer, the inspector, and the library drawer are shared — switching views never destroys state in either one. Your grid stays exactly as you left it while the Timeline plays, and flips back untouched.
Switch with the Session / Arrangement toggle in the master bar, or press Tab. The toggle is the mode switch: one view, one driver, no ambiguity for whoever's running the show.
Anatomy of the view

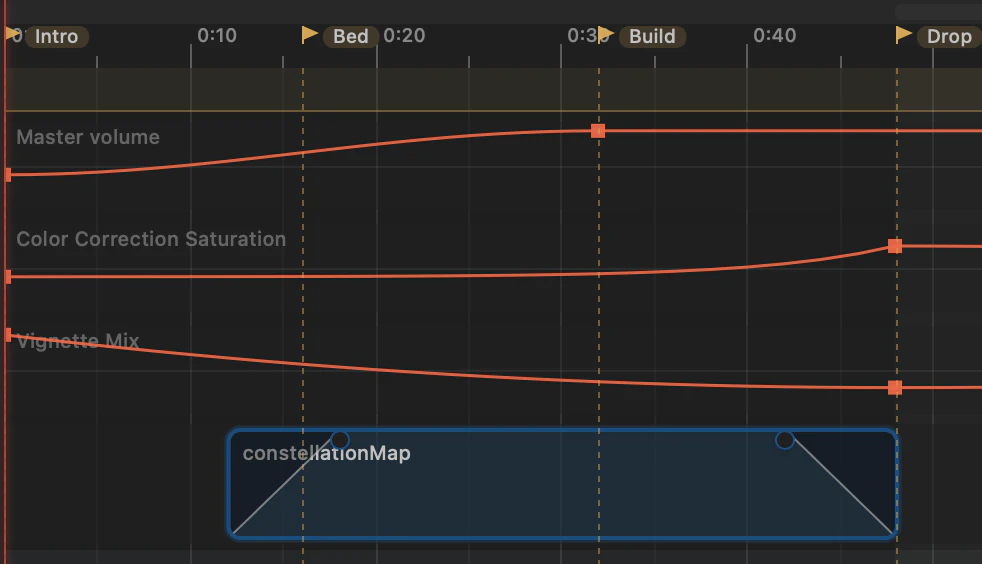
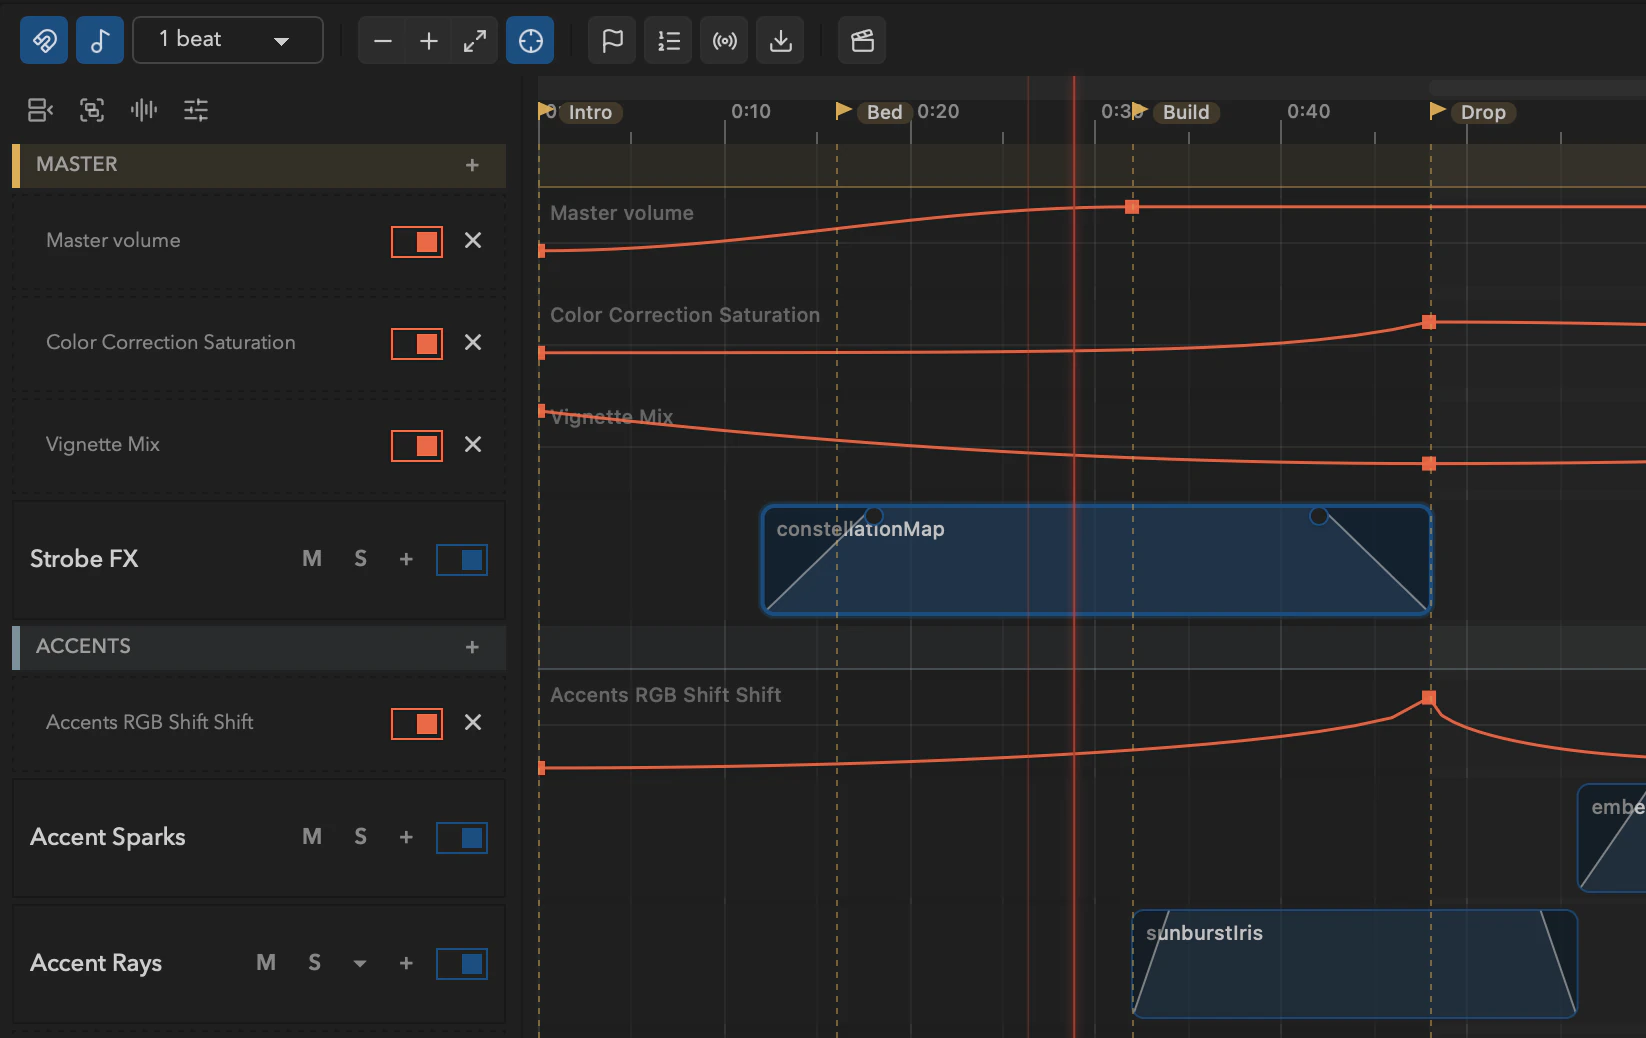
- Toolbar — snapping toggle and grid division, time-vs-beat grid, zoom-to-fit, follow-playhead, the Show settings, and the Capture and Export buttons.
- Ruler — the time scale in
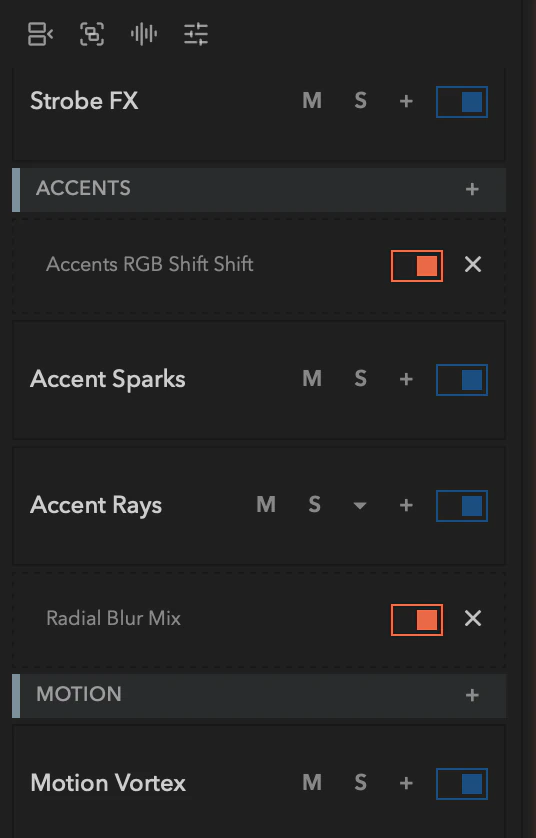
M:SS. Click to seek, drag to scrub. Cue markers sit here as flags, and the loop region shows as a shaded band. - Track headers — one row per track down the left edge, each with mute and solo for auditioning parts of the arrangement. The master track sits at the top (for master automation); visual tracks bind to your Player layers and reuse the same row controls; audio tracks carry the soundtrack. Grouped layers render as header bands, just like the grid. Drag a header to reorder, right-click it for the full menu, and drag the column divider to resize it.
- The canvas — every clip, waveform, fade, crossfade, and automation curve draws here as one surface, so hundreds of clips pan and zoom smoothly. Clips are tinted by kind (animation, video, still, external), show a thumbnail, and lift slightly when they're playing under the playhead.
- Playhead — the vertical line marking the current time
T. It follows playback DAW-style, page-flipping when it reaches the edge rather than scrolling continuously.
Tracks bind to layers
A visual track is bound one-to-one to a Player layer — it stores clip placements, while the layer keeps its own name, opacity, blend mode, effect chain, and group membership. Whatever a layer does in the grid, it does on the timeline; the Timeline only decides what content that layer shows at each moment.
Because tracks and layers are two views of the same stack, they stay in sync automatically:
- Add a layer (in either view) and a bound, empty track appears at the matching position.
- Delete a layer and its track — clips and automation included — goes with it. Filament warns first when the track isn't empty.
- Reorder or group layers and the tracks mirror the new stack order.
Audio tracks are timeline-only — they hold the show's soundtrack and enter the mix as stems. See Audio Tracks.
The transport
In Arrangement view the master bar's center cluster becomes a timeline transport:
| Control | What it does |
|---|---|
| Play / Pause | Start or pause the playhead. |
| Jump to start | Send the playhead back to the start. |
| Position readout | The current time as M:SS.mmm. Click it to type an exact position. |
| Loop toggle | Enable or disable the loop region. |
| Previous / Next cue | Theater-style GO — jump to the marker before or after the playhead. |
| Record-arm | Arm live automation recording. |
Clicking the ruler also drops a ghost playhead — a mark you can return to. From a pause, one of Space / Shift+Space resumes in place and the other restarts from that mark; Settings → General → Timeline decides which is which, because which one feels like "play" is genuinely personal.
BPM, tap tempo, master brightness, and blackout stay put — they're master controls and remain instantly reachable during a show. Because the arrangement runs on its own clock, tempo sync (Ableton Link, Pioneer, MIDI clock) shows a suspended in Arrangement state and resumes when you flip back to Session.
Time is wall time
The ruler is measured in minutes and seconds, and that's canonical: a 12-minute composition takes 12 minutes, always. Master Speed doesn't warp the timeline — if you want something to run faster or slower over the show, automate its rate instead. When your piece is cut to music, turn on the beat grid in the toolbar and snapping follows the project BPM without adding a second source of truth.
Frame-exact, every run
The Timeline's core promise: the frame you see at time T is a pure function of the time and the composition. It doesn't matter how you got there.
- Seeking is exact. Scrubbing to
4:32.5shows the same frame you'd get by playing from the top. - Loops are seamless. A loop wrap lands on exactly the frame you'd reach by seeking — no gap, no click, for days.
- Export matches playback. The rendered file is the same pixels the live show produced (see Capture & Export).
That determinism is what makes an unattended install trustworthy: it survives seeking, looping for hours, autoplay on launch, and crash-recovery without ever drifting from what you composed.
Getting around
- Zoom with
+/-(around the playhead), the scroll wheel or pinch (around the cursor),Zto frame the selection, orCmd+0to fit the whole show. - Pan by dragging empty space or scrolling; vertical scroll moves through tracks.
- Seek by clicking or dragging the ruler — or by dragging the playhead line right where you're working, in the lane area.
- Jump between markers with
,/., and between clip edges withAlt+←/Alt+→. - Follow-playhead in the toolbar keeps the playing region in view.
Arranging Clips
Place, trim, split, fade, and crossfade clips on tracks
Automation
Draw curves, record knob moves, and run LFOs on any parameter
Audio Tracks
Drop a soundtrack, see its waveform, and arrange visuals against it
Show Mode
Loop, cue markers, autoplay, and running unattended for days
Capture & Export
Record a live performance, then render to a video file and a DMX show
The Player
The Session grid the Timeline shares its project with
Master & Preview
The master bar and the four live preview surfaces — transport, global controls, the master modulation rack and effects chain, the dashboard, and previews that match your LEDs exactly.
Arranging Clips
Drag clips onto tracks, then move, trim, split, duplicate, fade, and crossfade them — direct manipulation with snapping and one undo step per gesture.