MIDI Control
Map a hardware controller to Filament — learn a fader to any parameter, fire clips and transport from pads, and manage every binding in the Connections tab.
Plug in a MIDI controller and drive Filament with your hands. Faders and knobs ride parameters; pads and buttons fire actions like launching a clip or hitting blackout. Binding is a quick "learn" gesture — click an on-screen control, move the physical one, done. No menus of channel numbers.
Every binding lives in the Connections tab of the library drawer (F6). That's where you arm MIDI Learn, see what's mapped to what, and edit or remove a mapping.
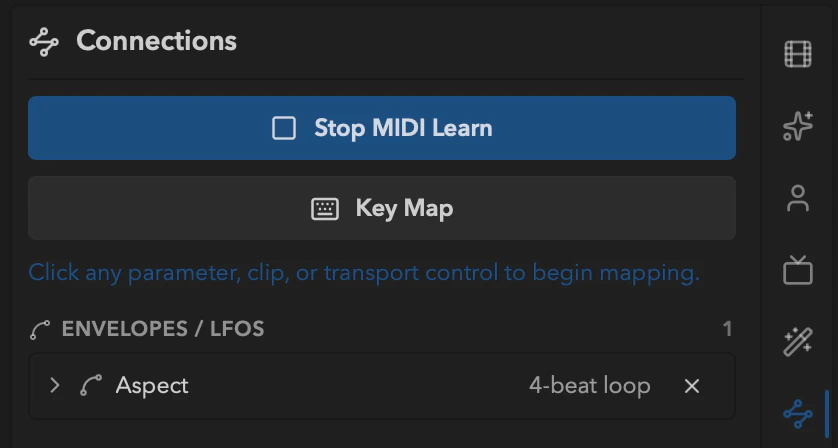
The learn loop
- Open the library drawer to Connections (
F6) and clickMIDI Learnto arm it. - Click the on-screen control you want to bind — a parameter fader, a clip cell, a transport button. A
waiting…overlay marks it. - Move the physical control — sweep a fader or hit a pad. Filament catches it, pairs the two, and the binding appears in the list.
- Learn stays armed, so click the next control and keep going. Click
Stop MIDI Learnwhen you're done.
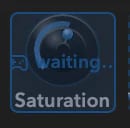
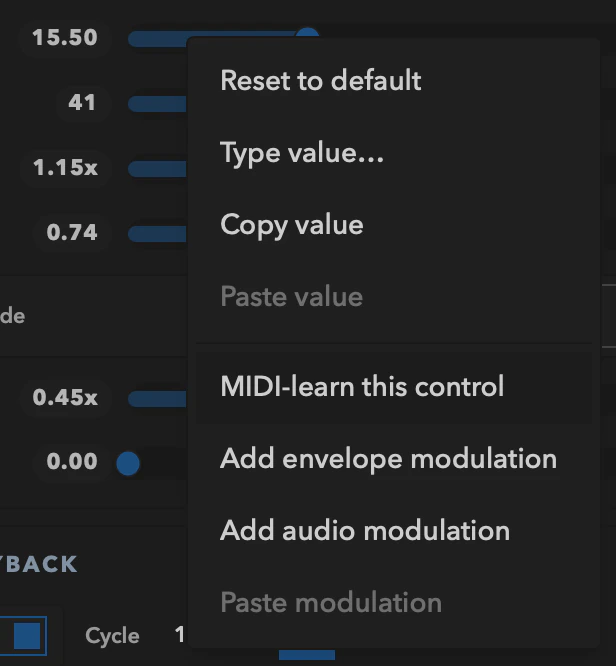
The shortcut: if you only want to bind one control, right-click it and choose MIDI-learn this control. That arms learn already pointed at that parameter, so all that's left is to move the knob. Same result, one step instead of three — reach for the Connections flow when you're mapping a whole controller at once.
A hint above the list tracks where you are: "Click any parameter, clip, or transport control to begin mapping." until you select one, then "Move a MIDI control to map ...". You can also toggle the mode from Player → MIDI Learn in the menu bar.
How a moved control is chosen
A controller dribbles jitter, sends aftertouch, or blasts every CC when it connects, so Filament doesn't bind the first thing it hears:
- A pad press (note-on) is unambiguous and binds immediately.
- A continuous control (CC) must travel at least 16 of 127 before it's accepted — and the CC that moves the most wins, so a wiggled fader beats an idle one drifting by a step.
A continuous target only listens for CC; a trigger target only listens for notes. Knobs and faders modulate, pads and buttons fire.
Select a control but never move anything and the pending selection clears after 10 seconds — learn stays armed so you can try again.
Disarming
Learn never lingers out of sight. It disarms when you click Stop MIDI Learn, press Esc, close the library drawer, or switch to another drawer tab. While disarmed, zero MIDI traffic reaches the UI — your show runs clean.
One control, one mapping
A physical control maps to exactly one thing. Learning a control drops any existing binding on that same source first, so you never end up with one control doing two jobs.
Continuous controls (faders and knobs)
A fader or knob drives any numeric parameter — clip, effect, layer, or master — across an output range you set. A continuous MIDI mapping is a modulation source, so it shares a parameter's single modulation slot with audio and envelopes. See Modulation.
The per-mapping editor
Expand a row in the MIDI controls group to edit its mapping. The header names the bound control (for example CC 74 · ch 1) with a Relearn button that re-arms learn for this target so you can reassign it to a different physical control. Relearning re-seeds the defaults below, so set those again afterward.
| Control | Options | Notes |
|---|---|---|
Mode | Absolute · Relative | Absolute for standard faders/knobs; Relative for endless encoders. |
Takeover | Pickup · Jump | Absolute only. Pickup waits until the physical control crosses the current value, then takes over — no jumps. Jump snaps immediately. |
Encoding | 2's comp · Signed bit · Offset 64 | Relative only — how your encoder sends "+/−" steps. Replaces Takeover. |
Slew | 0–1000 ms | Smoothing toward the incoming value. 0 is direct. |
Invert | toggle | Controller's max drives the parameter's min. |
The output range itself — the two markers and the live applied value — lives on the fader directly above the editor, the same one the player shows inline.
A freshly learned continuous control starts at Absolute mode, Pickup takeover, Slew 0, Invert off, and the parameter's default output range. Adjust from there.
Triggers (pads and buttons)
Pads, buttons, and notes fire actions the moment you hit them — no UI focus required, so a blackout pad always works even mid-drag elsewhere. While learn is armed, these become click-to-select instead of click-to-fire.
| Action | Where you click to learn it | Label in Connections |
|---|---|---|
| Launch a clip | a clip cell in the grid | Launch <layer> · <column> |
| Launch a column | a column header | Launch column <name> |
| Play / pause | the transport play/pause button | Play / Pause |
| Blackout | the blackout button | Blackout |
| Tap tempo | the tap button | Tap tempo |
| Resync | the resync button | Resync |
| Bypass a layer | the layer's enable toggle | Bypass <layer> |
| Stop a layer | the layer's stop control | Stop <layer> |
| Bypass an effect | an effect instance's bypass toggle | Bypass effect |
| Stop all layers | the Stop-all square beside Blackout | stop-all |
| Next / previous cue | the cue buttons in the Arrangement transport | Next cue (GO) · Previous cue |
A pad on Stop all is the mapping to make before your first gig. When something goes wrong, the muscle memory you want is one pad, not a mouse hunt.
Bare computer keys can launch clips and columns too, without a controller — see the Key Map.
Triggers appear in the MIDI triggers group, each with a Relearn button to reassign the pad and a remove control.
The Connections tab
The Connections tab (F6) is a living, grouped list of every parameter connection in the project — not just MIDI. Bindings fall into four groups, each with a count badge; empty groups are hidden.
| Group | What it holds |
|---|---|
MIDI controls | Continuous CC mappings (faders/knobs → parameters). |
MIDI triggers | Note mappings (pads/buttons → actions). |
Audio reactive | Parameters driven by audio analysis. |
Envelopes / LFOs | Parameters driven by envelope shapes. |
Each row shows the target's label and a one-line source summary (CC 74 · ch 1, Note 36 · ch 1). Expand to edit inline; × to remove. A binding whose target no longer exists — a deleted clip, layer, or effect — is flagged (missing) so you can clear orphans.
This tab is the single home for MIDI: there's no "MIDI" option in the per-parameter modulation menu — continuous MIDI mappings are created by learning and edited here. (The modulation menu still creates audio-reactive and envelope sources directly.)
Devices
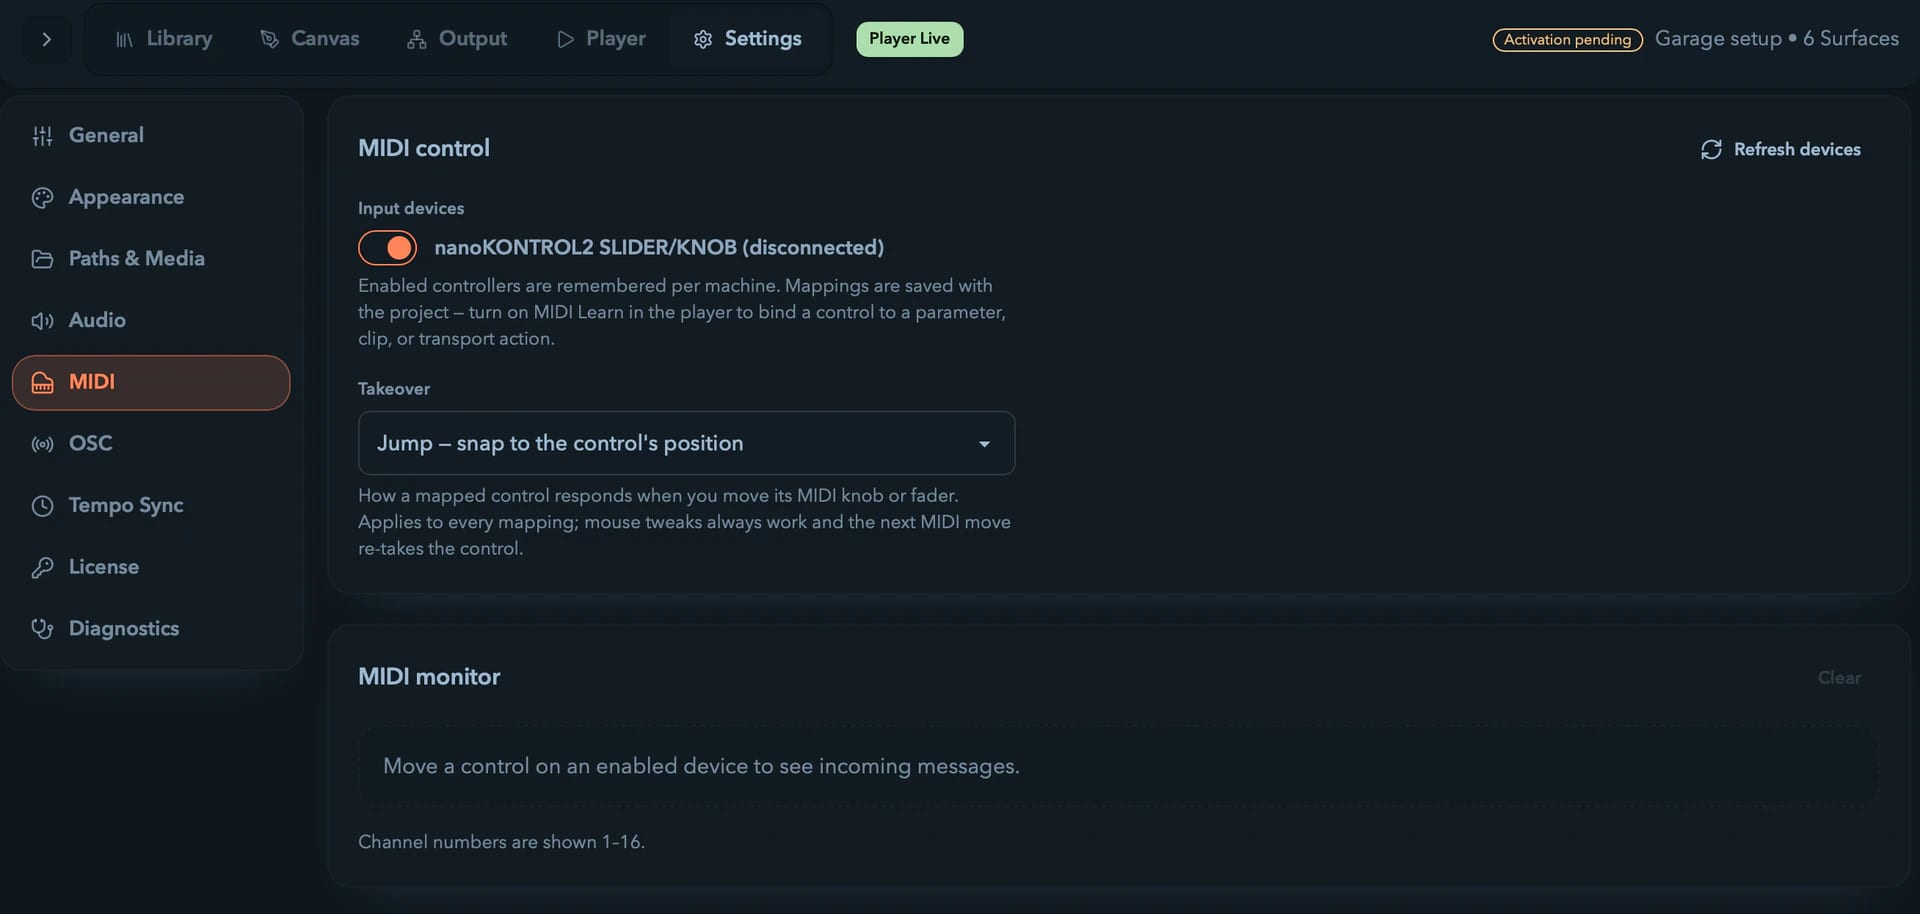
Choose which controllers Filament listens to under Settings → MIDI (MIDI control):
Input deviceslists every connected MIDI input with a toggle each — enable the controllers in your rig.Refresh devicesrescans the ports after you plug something in.- A device you enabled but later unplugged stays listed, tagged
(disconnected).
Two scopes keep a show portable while the rig stays put:
- Enabled devices — remembered per machine, so which controllers are on belongs to the rig you're sitting at.
- Mappings — saved with the project, so a show travels with its full controller layout and reconnects to the same device by name.
Modulation — Audio & Envelopes
Turn any numeric control into a live-driven one — make parameters react to sound with a draggable bandpass band, or draw beat-synced envelopes and LFOs that ride a parameter on their own.
OSC Control
Drive Filament over the network with OSC — send to a documented /filament/... address to move any parameter or fire any action, with feedback so a phone, tablet, console, or Max patch stays in sync. No cables, no mapping step.