Effects
Drop GPU effects onto a clip, a layer, or the master output, chain them, recall presets, and ride their parameters live — blur, glitch, color, trails, and your own shaders.
Effects are filters: they take the pixels of a clip, a layer, or the whole composition and hand back new ones. Trails, hue rotation, blur, pixelate, RGB shift, kaleidoscope, glitch — all effects. Drag one on, stack a few, recall a preset, ride the parameters live. Unlike animations, an effect reshapes an existing image rather than generating one.
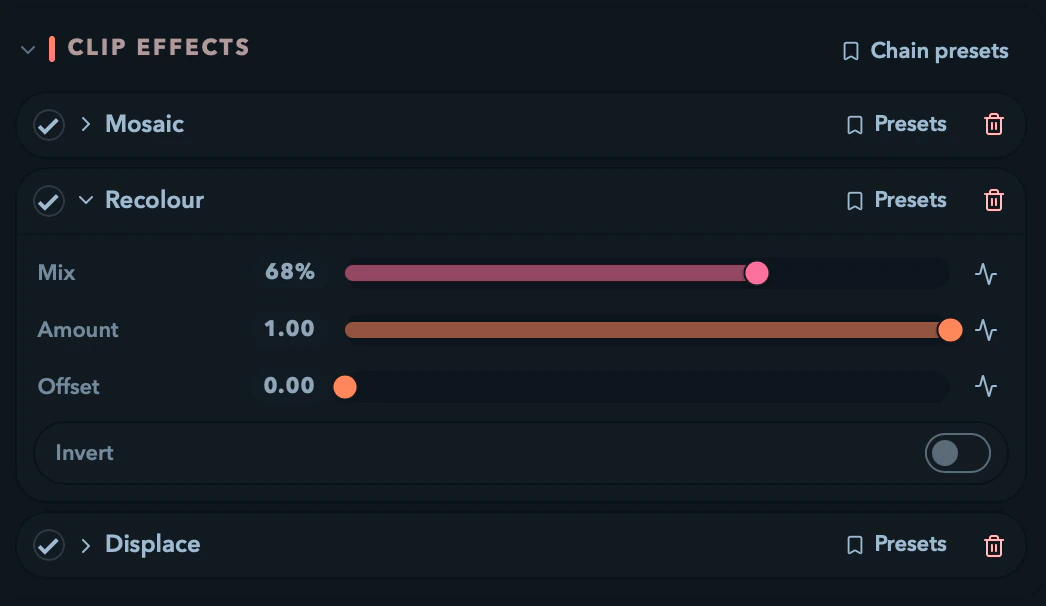
Where effects live
An effect chain attaches at three points in the pipeline:
- A clip — just that cell's content, before the layer's crossfade.
- A layer — everything the layer composites, after its clips.
- The master — the whole blended composition, the last thing before output.
Browse built-ins (grouped by category) and your own user effects under the Effects tab of the library drawer (F5), with a Search effects box. To add one:
- Drag a tile onto a chain editor, a grid cell (that clip's chain), or a layer header (that layer's chain).
- Double-click a tile to drop it on the resolved chain — clip if a cell is selected, otherwise group, layer, then master.
- Right-click a tile to pick the target explicitly: Add to selected cell / group / layer / master chain.
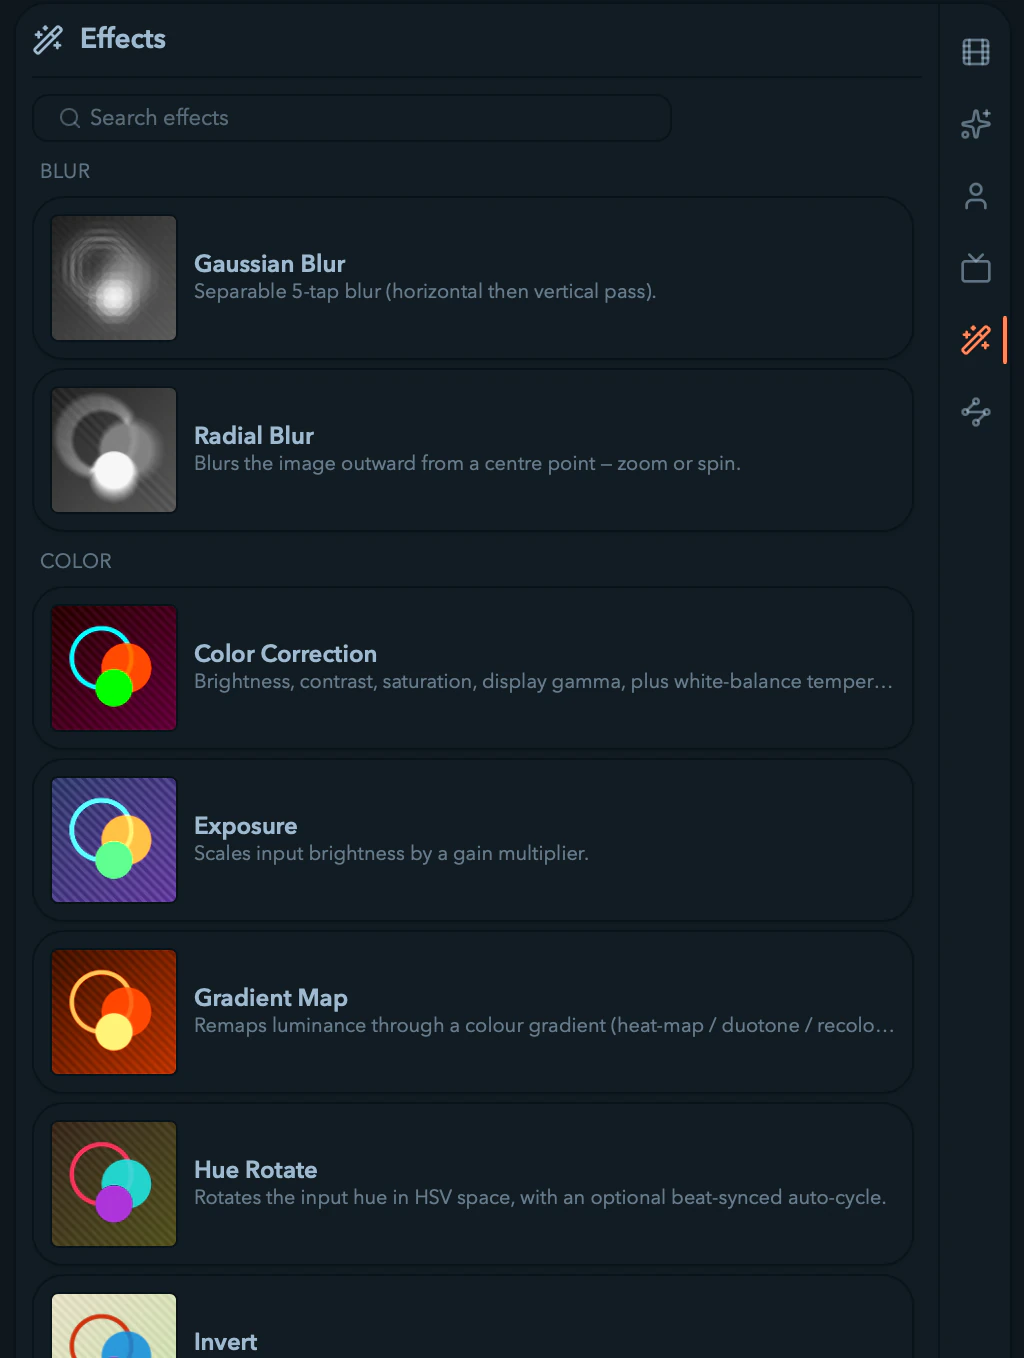
A chain holds up to 16 effects.
Keying: punching holes for the layers below
Two effects make parts of a clip transparent instead of recoloring them — Chroma Key and Luma Key. Because the compositor honours per-pixel transparency, wherever a keyer cuts pixels out, the layers below show through; on the bottom layer the keyed area reads as black. This is how you drop a green-screen subject over another layer, or knock the dark background out of footage so a lower layer fills it.
Chroma Keykeys by hue — setKey Hueand aHue Rangeto a green or blue screen, raiseMin Saturationso dark neutrals survive, and feather the edge withSoftness. Turn onDespillto kill the colored halo a key leaves around the subject.Luma Keykeys by brightness — pixels darker thanThresholdgo transparent,Softnessfeathers the cut, andInvertflips which end disappears (key out the brights instead of the darks).
Stack a key on a clip that sits on a layer above the content you want revealed. The key only matters once something is underneath it; on the lowest layer there's nothing to show through, so the holes are just black.
Palette-aware color
Two color effects map an image's brightness through a color ramp instead of shifting hues directly:
Recolourmaps luma through the cell's active palette. Switch the cell's palette and the recolor follows it instantly — the same effect re-tints itself to whatever scheme you've cued.Offsetrotates where the ramp starts, andInvertflips dark-to-bright.Gradient Mapdoes the same thing through a fixed built-in gradient (thermal,fire,ice,sepia,mono,spectrum) rather than the palette — reach for it when you want a specific ramp regardless of the cell's palette.
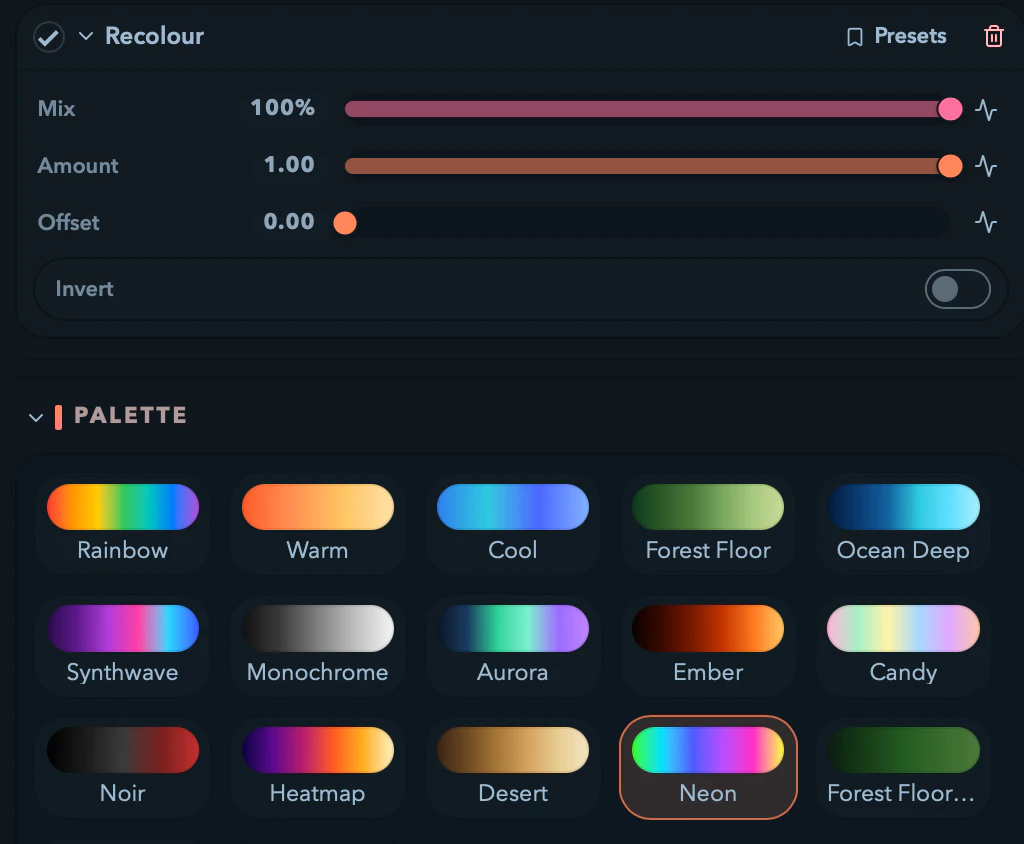
Both pin the look to luminance, so motion stays readable while the color rides your chosen scheme. See Palettes for building and switching the ramps Recolour follows.
The chain editor
Each chain is a collapsible Effects rack listing its effects top to bottom. Every row has a drag handle (drag to reorder, or drop onto another chain to move it there with its state intact), an enable/bypass checkbox, a Presets menu, and a remove button. Click an effect's name to expand it and reveal its Mix slider — the dry/wet blend, 0–100% — and its parameters.
Parameters update live, and any numeric one can be driven by audio, an envelope, or an LFO or mapped to a MIDI control. The bypass toggle is itself a MIDI-learn target, so you can map it to a pad.

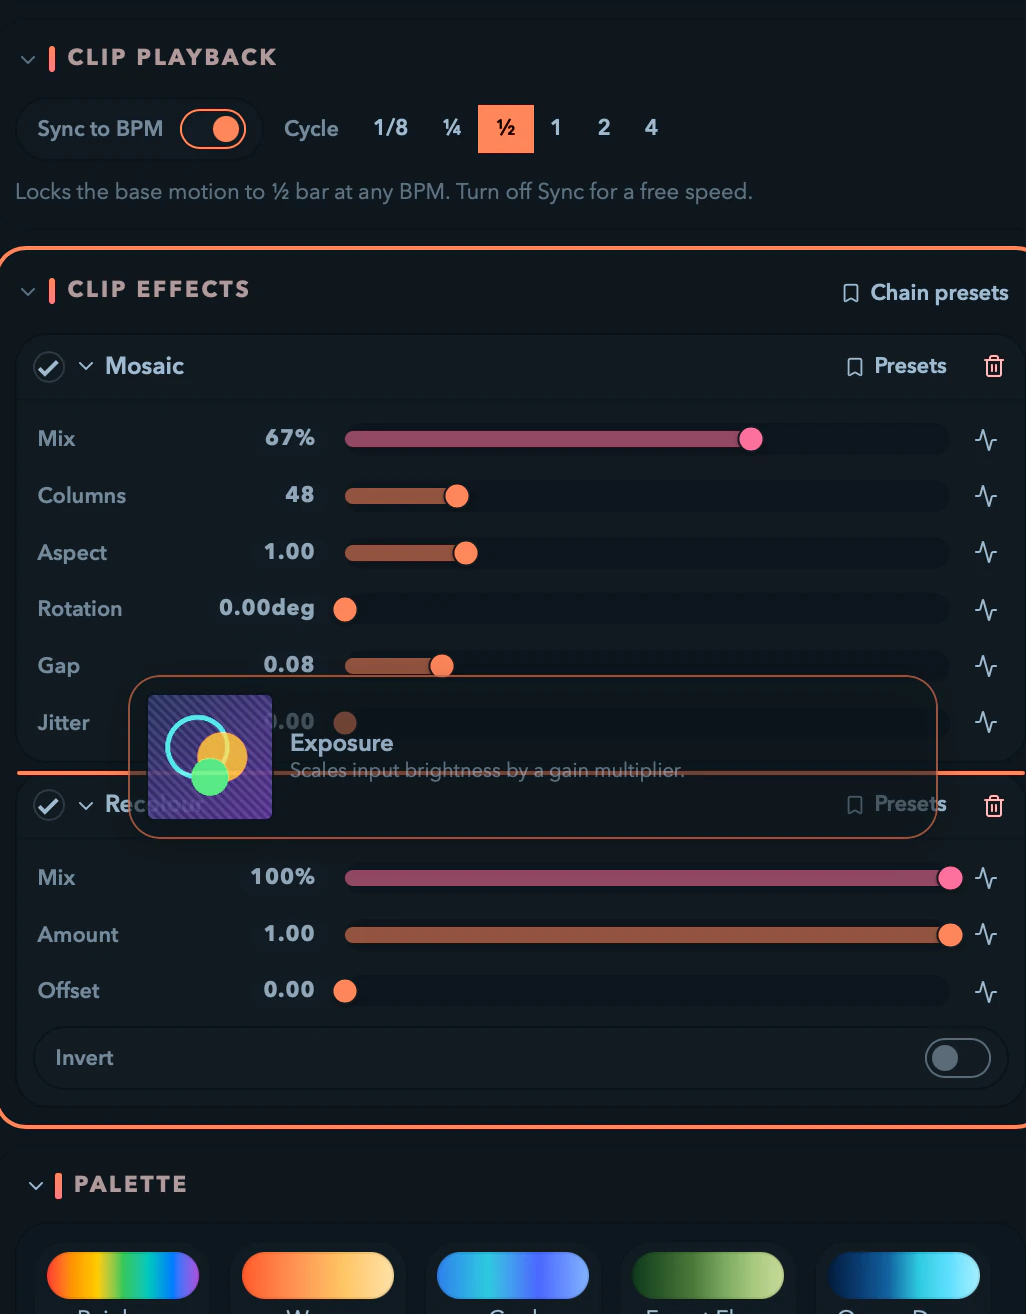
When you drag an effect over a chain, an insertion line shows where it'll land — you can drop it between any two effects, not just at the end. Moving an effect with feedback state (like Trails) starts its trail fresh in its new home.
Duplicating and moving effects
- Plain drag moves an effect — reorder within a chain, or drop it on another chain to relocate it.
Alt-drag duplicates instead: the copy lands at the drop index and the source stays put. Works within one chain (a sibling copy, for stacking two blurs at different radii) and across chains (a copy in the target, original untouched).
The effect clipboard
Right-click an effect row for Copy, Cut, Paste after, and Delete. Right-click empty rack space for Paste, which appends. This is how you get a tuned effect from a clip chain onto the master without rebuilding it.
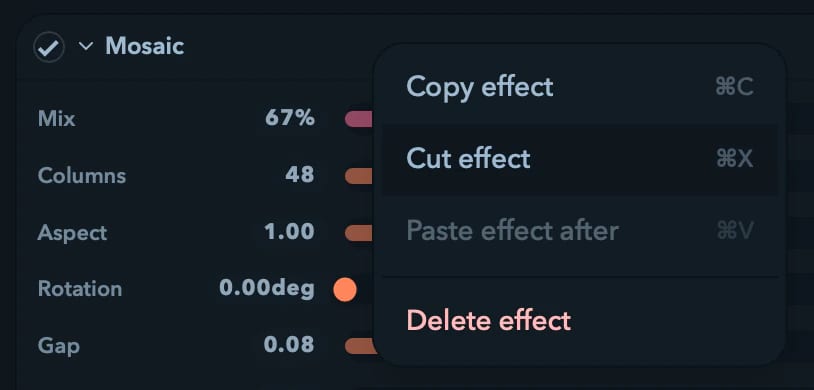
Pasted effects carry their parameter values, not their modulations — a copy that inherited a live audio binding is rarely what you meant, and re-binding is one right-click. The clipboard clears when you switch projects.
Fold state sticks
Expand two effects on a clip's chain, hop to another clip and back, and they're still expanded. Fold layout is remembered per chain, so switching around while you tune doesn't re-collapse everything you were looking at. A freshly dropped effect auto-expands, since you dropped it to adjust it. Removing an effect leaves other chains' layouts alone.
Two badges flag trouble: missing means the chain references an effect that isn't installed here (install it and it resolves), and failed means the shader didn't compile — it renders passthrough and shows the compiler error when expanded. A broken effect never takes down the show.
Tempo-locked motion
Effects that move — strobes, warps, drifting glitch — lock to the master tempo instead of a wall clock, so their motion lands on the beat. Their rate knobs are labeled in beats (Rate (beats), Spin (beats), Speed (beats)), and dragging one re-paces the motion smoothly rather than jumping it.
Presets and templates
Two layers of presets, both saved on this machine:
-
Per-effect presets — the
Presetsmenu on each row. Recall a saved look, or name and save the effect's current parameters as your own.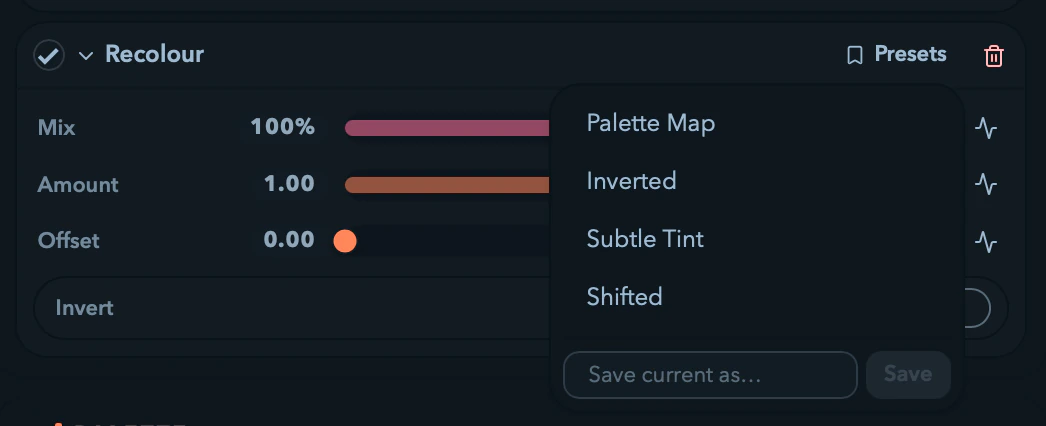
-
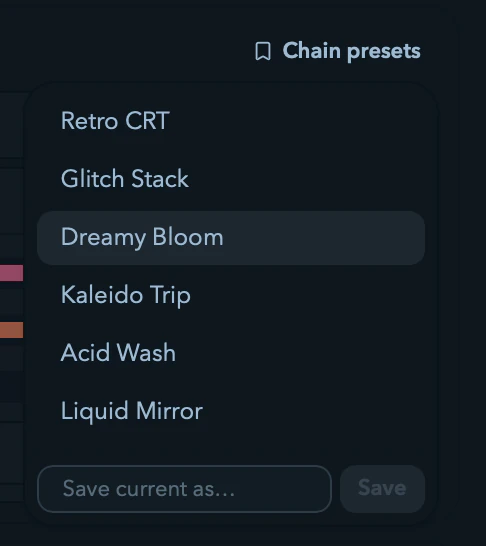
Chain templates — the
Chain presetsmenu in the rack header. Save or apply a whole stack. Applying a template replaces the chain; if it isn't empty, Filament asks you to confirm first.
A preset (and a chain template) captures more than parameter values — it also remembers any modulation bound to those parameters. Recall it on another effect and the audio, envelope, and LFO bindings come back with it, so a saved look that breathes on the kick keeps breathing wherever you drop it.
Every effect with parameters ships with built-in presets, and six chain templates ship ready to drop on any chain:
| Template | Stack (top to bottom) |
|---|---|
| Retro CRT — chunky scanline-pixel look | Pixelate → RGB Shift → Color Correction |
| Glitch Stack — aggressive datamosh | RGB Shift → Slices → Color Correction |
| Dreamy Bloom — soft glowing wash | Gaussian Blur (50% mix) → Color Correction |
| Kaleido Trip — spinning mirror with trails | Kaleidoscope → Hue Rotate → Trails |
| Acid Wash — high-contrast solarized color cycle | Solarize → Hue Rotate → Color Correction |
| Liquid Mirror — flowing displacement with feedback | Displace → Mirror → Trails |
Built-in effects reference
Filament ships 29 built-in effects, grouped by category in the Effects tab (blur, color, distort, glitch, stylize, tempo, time). Every numeric parameter is rideable by modulation and MIDI. A few parameters aren't numeric: an enum shows as a dropdown, a toggle as a checkbox, and a color parameter (like Vignette's Colour) opens a small color-swatch picker alongside the faders.
blur
| Effect | Parameters (range · default) |
|---|---|
| Gaussian Blur — separable 5-tap blur (horizontal then vertical pass) | Radius 0–32 · 4 |
| Radial Blur — blurs along radial lines from a center; zoom-blur or spin-blur | Amount 0–1 · 0.3; Center X −0.5–0.5 · 0; Center Y −0.5–0.5 · 0; Mode (zoom / spin) · zoom |
color
| Effect | Parameters (range · default) |
|---|---|
| Exposure — scales brightness by a gain multiplier | Gain 0–4× · 1 |
| Hue Rotate — rotates hue in HSV, with an optional beat-synced auto-cycle | Hue 0–360° · 0; Auto Cycle (beats) 0–4 · 0 |
| Invert — inverts the color | none |
| Solarize — inverts channels above a threshold (Sabattier effect) | Threshold 0–1 · 0.5 |
| Color Correction — brightness, contrast, saturation, gamma, plus white-balance temperature and tint | Brightness −1–1 · 0; Contrast 0–2 · 1; Saturation 0–2 · 1; Gamma 0.25–4 · 1; Temperature −1–1 · 0; Tint −1–1 · 0 |
| Gradient Map — remaps luma through a built-in gradient preset | Gradient (thermal / fire / ice / sepia / mono / spectrum) · thermal; Amount 0–1 · 1; Invert (toggle) · off |
| Recolour — maps luma through the clip's active palette as a lookup | Amount 0–1 · 1; Offset 0–1 · 0; Invert (toggle) · off |
distort
| Effect | Parameters (range · default) |
|---|---|
| Pixelate — quantizes into blocks; aspect stretches them horizontally | Block 1–128 · 16; Aspect 0.25–4 · 1 |
| Mirror — mirrors one half of the image onto the other | Vertical (toggle) · off |
| Kaleidoscope — mirrors the image into radial segments around the center | Segments 2–24 · 6; Angle 0–6.28 (radians) · 0; Spin (beats) −4–4 · 0; Zoom 0.25–4× · 1; Center X −0.5–0.5 · 0; Center Y −0.5–0.5 · 0 |
| Displace — offsets each pixel by a flowing noise field, drifting on the beat | Amount 0–0.2 · 0.03; Scale 1–64 · 8; Speed (beats) 0–4 · 1; Detail 1–4 · 1; Direction Bias −1–1 · 0; Chromatic Spread 0–1 · 0 |
| Wave — sinusoidal UV warp that scrolls on the beat | Amplitude 0–0.1 · 0.02; Frequency 1–32 · 8; Speed (beats) 0–8 · 1; Axis (both / horizontal / vertical) · both; Harmonic 0–32 · 0; Phase 0–6.28 · 0 |
| Transform — scales, rotates, and repositions around the center, with selectable edge wrap | Position X −1–1 · 0; Position Y −1–1 · 0; Scale 0.05–8 · 1; Scale X 0.05–8 · 1; Scale Y 0.05–8 · 1; Rotation −3.14–3.14 (radians) · 0; Spin (beats) −4–4 · 0; Edge Wrap (clamp / tile / mirror / none) · clamp |
| Twirl — swirls pixels around a center, falling off to a radius | Strength −3.14–3.14 · 1.5; Radius 0.1–1.5 · 0.8; Spin (beats) −4–4 · 0; Center X −0.5–0.5 · 0; Center Y −0.5–0.5 · 0 |
| Fisheye — bulges or pinches the image through a spherical lens | Amount −1–1 · 0.5; Radius 0.1–1.5 · 1; Center X −0.5–0.5 · 0; Center Y −0.5–0.5 · 0 |
glitch
| Effect | Parameters (range · default) |
|---|---|
| RGB Shift — splits red and blue along an angle, with beat-driven drift and a radial falloff | Shift 0–0.1 · 0.01; Angle 0–6.28 (radians) · 0; Shift Rate (beats) −4–4 · 0; Radial Falloff 0–1 · 0 |
| Slices — randomly shifts bands, reseeded on the beat | Slices 2–64 · 16; Amount 0–0.5 · 0.1; Rate (beats) 0.25–8 · 1; Direction (horizontal / vertical) · horizontal; Jitter 0–1 · 0; Smear 0–1 · 0 |
| Static — TV-static noise, reseeded on the beat | Amount 0–1 · 0.5; Block Size 1–128 · 1; Rate (beats) 0.25–16 · 8; Colour (mono / color) · mono |
stylize
| Effect | Parameters (range · default) |
|---|---|
| Posterize — quantizes each channel to N levels | Levels 2–32 · 6 |
| Edge Detect — Sobel edges on luma, blended over the source | Strength 0–4 · 1.5; Blend 0–1 · 1; Thickness 0.5–4 · 1; Color (mono / source) · mono |
| Mosaic — quantizes into a grid of tiles, with optional rotation, grout gap, and per-tile brightness jitter | Columns 1–256 · 32; Aspect 0.25–4 · 1; Rotation 0–360° · 0; Gap 0–0.5 · 0; Jitter 0–1 · 0 |
| Threshold — hard cut toward black/white at a luma threshold, with softness | Threshold 0–1 · 0.5; Softness 0–1 · 0.05; Color (mono / source) · mono |
| Vignette — darkens or tints the edges toward a color | Amount 0–1 · 0.6; Radius 0–1.5 · 0.85; Softness 0.01–1 · 0.45; Colour (color picker) · #000000 |
| Chroma Key — makes a hue range transparent (green/blue-screen keying) | Key Hue 0–360° · 120; Hue Range 0–180° · 40; Min Saturation 0–1 · 0.2; Softness 0–1 · 0.15; Despill (toggle) · off |
| Luma Key — turns pixels transparent by brightness | Threshold 0–1 · 0.4; Softness 0–1 · 0.15; Invert (toggle) · off |
tempo
| Effect | Parameters (range · default) |
|---|---|
| Strobe — gates brightness on the transport beat | Rate (beats) 0.25–8 · 1; Duty 0.05–0.95 · 0.5 |
time
| Effect | Parameters (range · default) |
|---|---|
| Trails — feedback trails; keeps the brighter of the current frame and the decayed previous output | Trails (retention) 0–0.96 · 0; Feedback Zoom 0.9–1.1× · 1; Feedback Spin (beats) −2–2 · 0; Decay Tint −1–1 · 0; Floor 0–0.5 · 0 |
Writing your own effects
A custom effect is a single effect.wgsl file — a small WGSL shader with // @… directives at the top, no separate manifest. The header names the effect, its category and its parameters; the body answers "given this input pixel, what comes out?" A whole effect can be tiny:
// @effect rgbShift
// @label "RGB Shift"
// @category glitch
// @param amount type=float min=0 max=0.1 default=0.01 label="Shift"

fn main(uv: vec2<f32>) -> vec4<f32> {
	let o = vec2<f32>(params.amount, 0.0);
	let src = fx_input(uv);
	return vec4<f32>(fx_input(uv + o).r, src.g, fx_input(uv - o).b, src.a);
}
The fastest way in is the New button on the User effects row of the Effects tab: it writes a working effect from a starter template, adds it to your library, and can put an AI prompt carrying the full authoring contract on your clipboard. Hot reload takes it from there — save the file and the next frame uses it.
Custom Effects is the full reference: the header grammar, the generated Params struct and tempo values, the prelude, palette access, multi-pass and feedback, limits, and a reference card you can hand to an AI assistant.
External Sources
Capture live video from other apps — NDI, Syphon, and Spout — straight into the Player grid and treat each feed like any other clip.
Custom Effects
Write your own Filament effects — the single-file effect.wgsl bundle format, the prelude and tempo contract, multi-pass and feedback, and live hot-reload.