Modulation — Audio & Envelopes
Turn any numeric control into a live-driven one — make parameters react to sound with a draggable bandpass band, or draw beat-synced envelopes and LFOs that ride a parameter on their own.
Most numeric controls in Filament — a clip parameter, an effect parameter, a master scalar — can stop being a fixed value and start moving on their own. Two sources drive a control from its own menu: an Envelope / LFO (a shape you draw that loops on the beat clock) and Audio reactive (a frequency band of the live input). MIDI is also a modulation source, but it's assigned differently — see MIDI control.
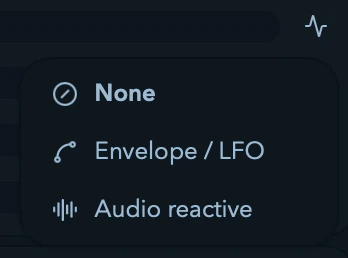
Controls that can be modulated carry a small icon button. Click it for a short menu:
| Choice | What it does |
|---|---|
None | Plain manual value. |
Envelope / LFO | A drawn cycle drives it on the beat clock (or a free clock). |
Audio reactive | A frequency band of the live input drives it. |
Switching is instant, and None always restores your manual value — modulation never overwrites it. While modulated, the button becomes the active source's icon and its tooltip names the mode (Modulation: Audio reactive on Speed).
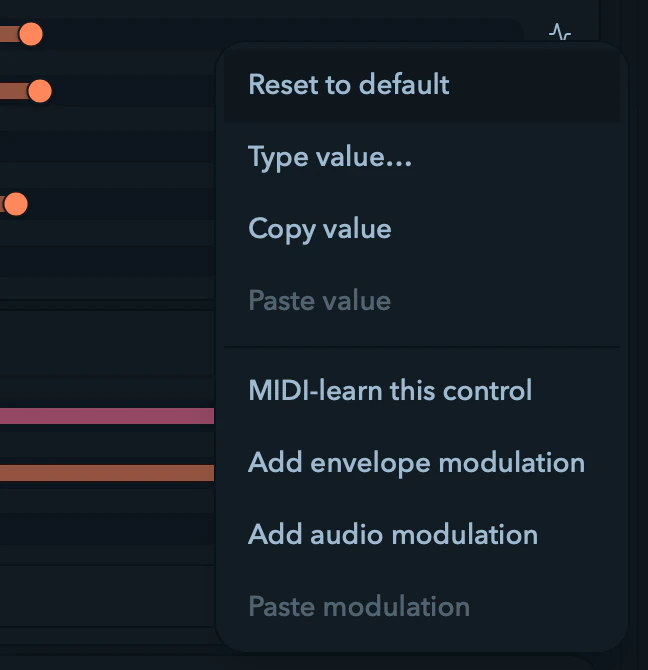
Right-click any control for the same thing plus more: Add envelope modulation, Add audio modulation, Remove modulation, Bypass modulation, and Copy / Paste modulation. Copy-paste is the quiet time-saver here — dial in one audio band exactly how you like it, then paste it onto five more parameters instead of rebuilding it five times.
What can be modulated
The menu appears on numeric controls only — integer and float parameters. Color, enum, and on/off controls don't get one. The candidates:
- Clip parameters — any numeric parameter of an animation clip.
- Effect parameters — any numeric parameter of an effect in any chain (clip, layer, or master).
- Master scalars —
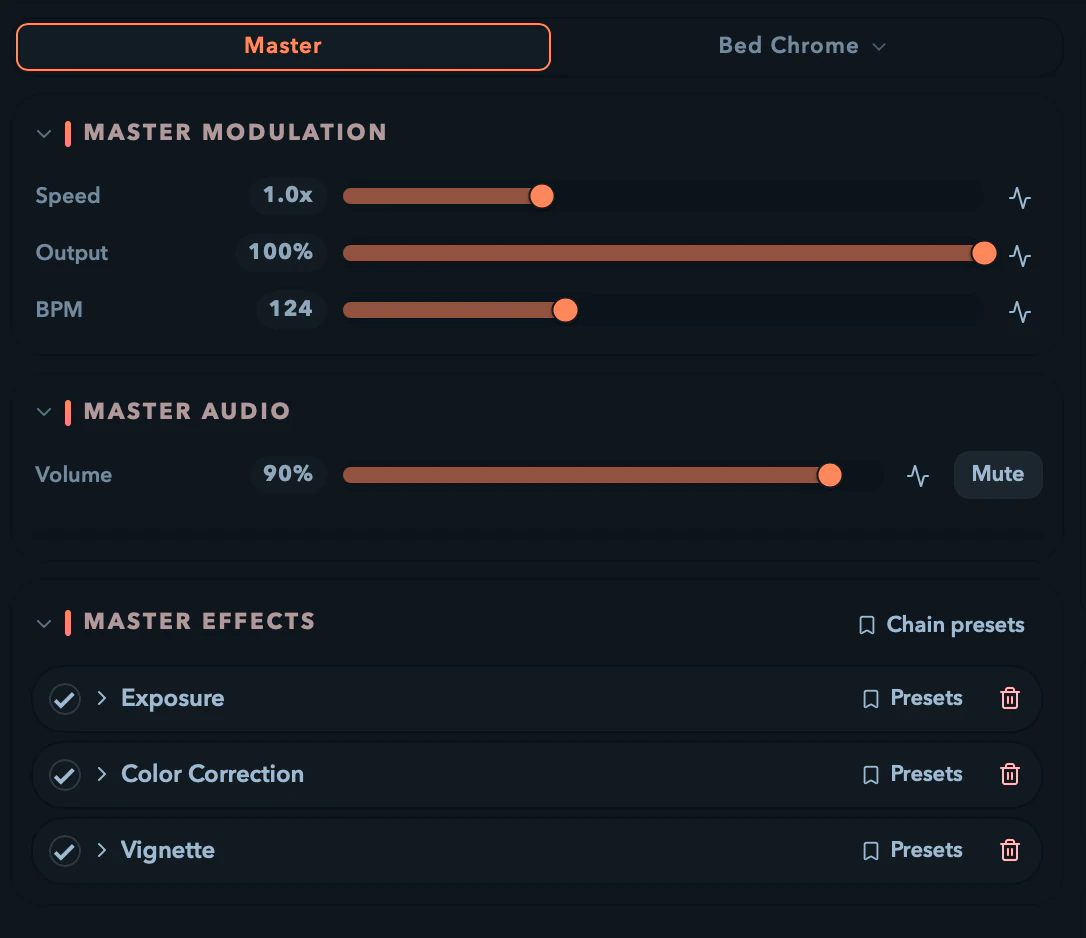
Speed,Output(master brightness), andBPM, modulated from the Master modulation rack since the master bar has no room for the editor.Xfadeisn't exposed for modulation yet.
A fresh modulation seeds its output range to the target's full range, so the value moves across the whole parameter until you narrow it.
Layer opacity is also a target, but it has no inline menu — its slider stays the manual control, and you attach modulation through MIDI Learn in the Connections tab (see MIDI control). A modulated opacity slider shows a small modulated badge.
The modulated fader
The moment a control becomes modulated, its manual fader is replaced by a modulated fader in the same column. Manual dragging is gone — the runtime owns the value now — and the track instead carries:
- Two output markers (
Output minimum/Output maximum) — drag them to set the values the parameter rides between as the source goes low → high. They can't cross. Double-click a marker to type its value exactly. - A live value dot that bounces between the markers, showing the exact value applied this frame — the same value your LEDs get — with the numeric readout following along.
At rest — silence, no input, or a frozen envelope — the dot sits at the output minimum (or the maximum with Invert on). With Invert off and the source at full, it reaches the maximum.
Bypassing without losing the work
Bypass modulation from the control's right-click menu parks a modulation without deleting it. The manual fader comes back, a Bypassed badge appears, the parameter uses your manual value — and the binding, the band, the curve, and the output range are all still there. Re-enable and it picks up modulating.
That's the difference between "let me hear this without the pumping" and "let me rebuild that audio mapping from scratch afterwards". Bypass state saves with the project, so a look you parked stays parked. A bypassed master knob shows a hollow badge instead of a filled one.

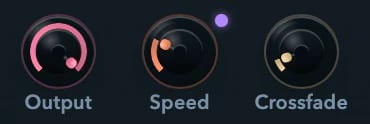
In the cramped master bar, a modulated master scalar (Speed, Output, BPM) shows only a small modulated dot badge (tooltip: Modulated — audio reactive / envelope / LFO / MIDI). Author the band or curve for those in the Master tab rack — see Modulating master controls.
Audio reactivity
Filament analyzes an audio input's frequency spectrum so parameters can ride the music. Pick the input device and switch on Enable audio reactivity in Settings → Audio (see Settings).
The master input monitor
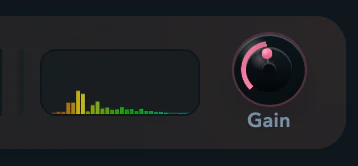
The master bar carries a non-interactive live input monitor — a spectrum of 32 log-spaced bands, bass left, treble right, moving with whatever's coming in. It shows a flat baseline at silence (or when no device is bound or reactivity is off) and a red tint along the top edge when the input clips. Its tooltip: drag the band under a parameter to map it.
Beside it is the Gain pot — an input gain that scales both the monitor and every mapping's band energy in real time, so quiet sources still reach your output range.
| Control | Range | Default | Scope |
|---|---|---|---|
Gain | 0×–4× | 1.00× | Per machine (saved locally, not in the project) |
The same gain appears as Master input gain in Settings → Audio — one setting, two places.
Mapping a parameter to sound
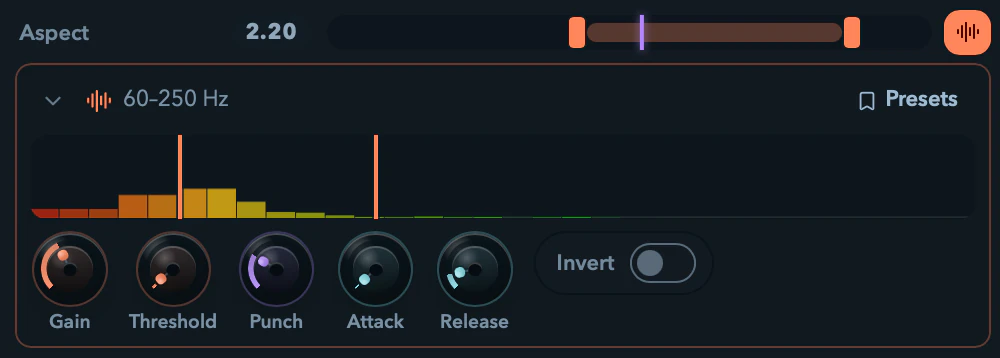
- Open the control's modulation menu and choose Audio reactive. The modulated fader appears, and a compact audio panel opens beneath it (its header shows the active band, e.g.
60–250 Hz). - Start from a preset.
Kick,Bass Pump,Snare / Clap,Hat Shimmer,Mid / Vocal,Smooth Swell, andBalanced (Full)each set a band and a response character in one click. Nine times in ten, pick the one named after the thing you want to follow and move on. - Or set the band by hand — drag the two bandpass handles across the mini-spectrum. They ride a log axis from roughly 20 Hz to 20 kHz and keep a small gap so the high handle can't slide under the low one.
- Set the output range on the modulated fader above (the two values the parameter moves between as the band goes quiet → loud).
- Shape the response:
| Control | Range | What it does |
|---|---|---|
Gain | 0–4× | Sensitivity — boost the band before shaping, on top of the master gain |
Threshold | 0–95% | Gate — ignore everything below this level, then rescale. This is what makes a parameter react to hits instead of to the whole mix |
Punch | 0.25–4 | Response curve — above 1 sharpens peaks and suppresses the floor, below 1 is gentler |
Attack | 0–1000 ms | Rise smoothing — how fast the value chases a rising band |
Release | 0–1000 ms | Fall smoothing — how fast the value falls when the band quiets |
Invert | on / off | Loud audio drives the parameter down |
Threshold and Punch are the two that turn a mushy mapping into a musical one. If a parameter is always somewhere in the middle and never at rest, raise the threshold until the quiet parts read as silence. If the hits don't feel like hits, raise the punch.
Every knob here double-clicks to type an exact value and right-clicks to reset.
A fresh mapping starts on a bass band with a snappy attack and a musical release. At silence the parameter rests at the bottom of its output range — no twitching. If the audio device disappears mid-show the spectrum zeros and the parameter rests at its minimum; reconnecting recovers it. Smoothing also keeps fast targets like Speed and BPM from flickering, since they ramp rather than jump.
Envelopes & LFOs
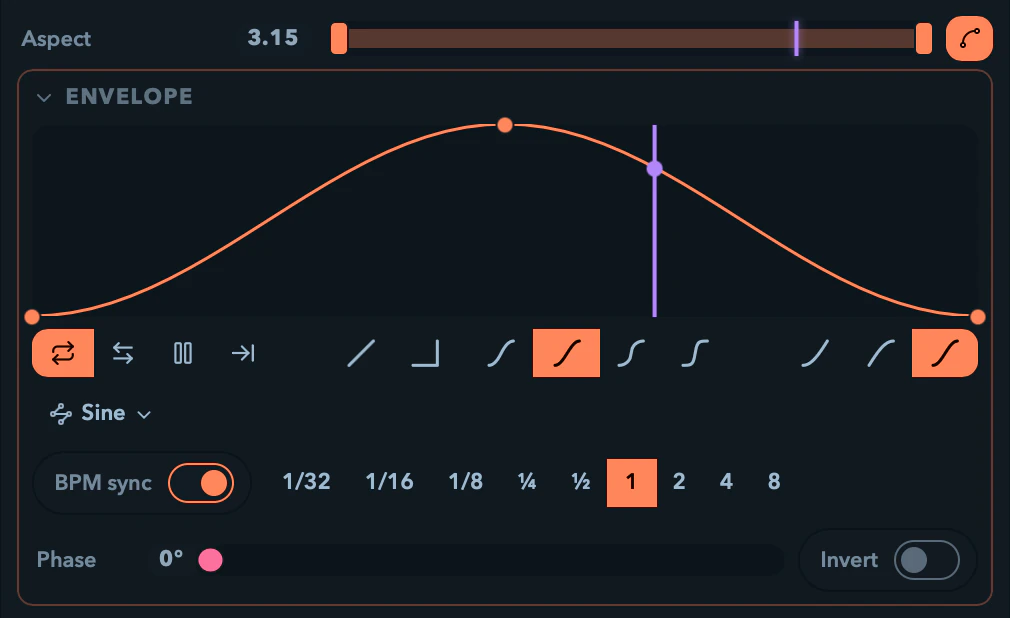
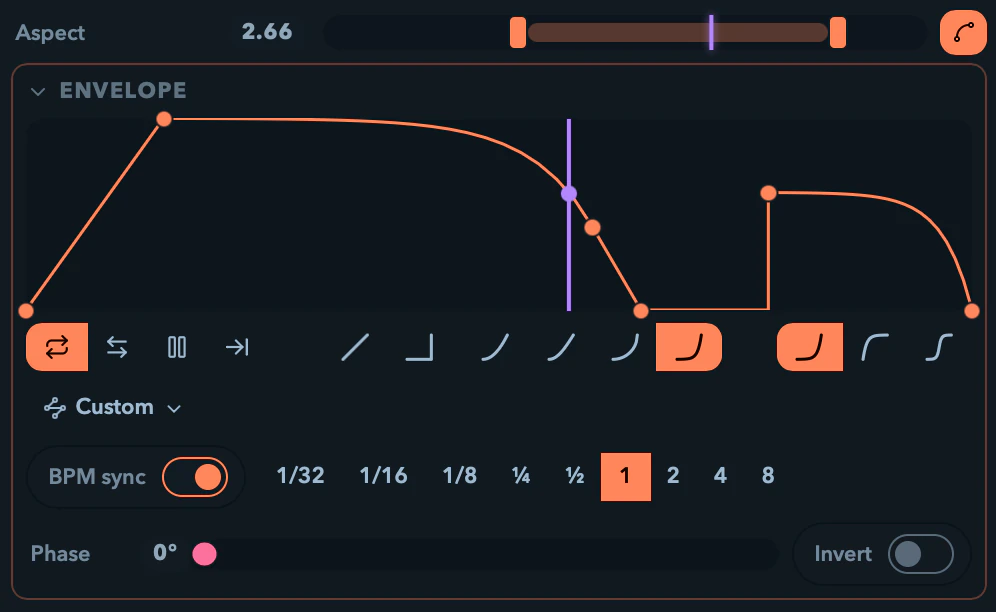
An envelope is a shape that plays on a clock and drives a parameter automatically — a hands-free LFO you can draw. Choose Envelope / LFO from the modulation menu and the inline editor opens with a fresh saw-up ramp synced to one bar.
Drawing the shape
- Preset shapes — start from
Sine,Triangle,Saw ↑,Saw ↓,Square, orRamp. - Editable points — click empty space to add a point, drag to move, alt-click to delete (the curve always keeps at least two).
- Per-segment interpolation — click a segment to cycle linear → smooth → hold (a stepped jump) and back.
- Live playhead — a vertical line sweeps the cycle with a dot riding the curve at the applied value, and the modulated fader bounces to match.
Transport and timing
| Control | Options | What it does |
|---|---|---|
| Transport | Loop / Ping-pong / One-shot (hold end) | How the cycle repeats |
Trigger | button | Restart the cycle now (fires a one-shot) |
BPM sync | on / off | Lock the cycle length to the master tempo |
| Length (BPM sync on) | 1/32 … 8 bars | Beat-locked cycle length (down to 1/8 beat for fast flicker) |
Length (BPM sync off) | 0.05 s–60 s | Free-clock cycle length in wall-clock seconds |
Phase | 0°–360° | Phase offset — shifts where in the cycle the readout begins |
Invert | on / off | Flip the output range (a high point reads as a low value) |
Free-run | on / off | Master targets only — keep advancing even while the transport is stopped |
The Trigger button restarts the cycle immediately and, on a one-shot, fires the single pass that holds at its end value. It's a transient runtime action — triggering doesn't change or save the project.
Because envelopes can lock to the beat, an envelope on a blur radius, a clip parameter, or Output pulses exactly in time with the master tempo and with the rest of your beat-synced clips and effects. While the transport is stopped, an envelope freezes at its current phase — both BPM-synced and free-clock cycles hold until you start playback again. The exception is Free-run, available only on master targets, which keeps advancing while stopped (so a master-brightness LFO can breathe between cues).
Modulating master controls
The master scalars (Speed, Output, BPM) live in the cramped master bar, so their full editor lives in the Master tab of the clip-params column instead. Open the Master modulation rack there and each scalar is a full modulated row with room for the bandpass panel or the envelope curve. A modulated master scalar still shows its small modulated dot up in the master bar.
One source per parameter
A parameter has one modulation source at a time. Choosing Audio reactive or Envelope / LFO swaps the source in place; None removes it and restores your manual value; Bypass parks it without removing it. MIDI is not in this menu — a MIDI assignment is created globally through MIDI Learn and managed in the Connections tab (F6); see MIDI control. A MIDI-driven control shows the same modulated badge with a MIDI tooltip.
Saved with your project
Modulations are part of your project — the audio band, the shaping, the envelope shape, the output range, whether a modulation is bypassed, and every other option ride along when you save and reload. The audio input device, the Gain value, and whether reactivity is enabled are per-machine preferences (stored locally), so the same project can use a different sound card on a different rig without re-editing your mappings. On load, an envelope starts from its phase offset rather than where it left off: loop and ping-pong cycles run from there, and a one-shot waits and fires only when you trigger it.
Custom Effects
Write your own Filament effects — the single-file effect.wgsl bundle format, the prelude and tempo contract, multi-pass and feedback, and live hot-reload.
MIDI Control
Map a hardware controller to Filament — learn a fader to any parameter, fire clips and transport from pads, and manage every binding in the Connections tab.